PeerDB is now natively integrated with ClickHouse Cloud!We recently announced the Postgres CDC connector in ClickPipes, now available in Public Preview.
This connector is fully powered by PeerDB.As a ClickHouse Cloud customer, you get a seamless, native experience for moving data from your Postgres databases to ClickHouse Cloud. Simply navigate to the Data Sources tab and add a Postgres source to start ingesting data.
Once PeerDB is connected to your , we will first do a full initial load of all the selected tables from your database. Then the continuous sync process will start using WAL to capture changes from the source database and apply them to the destination database.PeerDB will try to match the data types of the source and destination tables as closely as possible. If there are any data types that we are unable to match, we will use TEXT as the default data type. For data type mapping reference, please refer to the Data Type Mapping page.
1
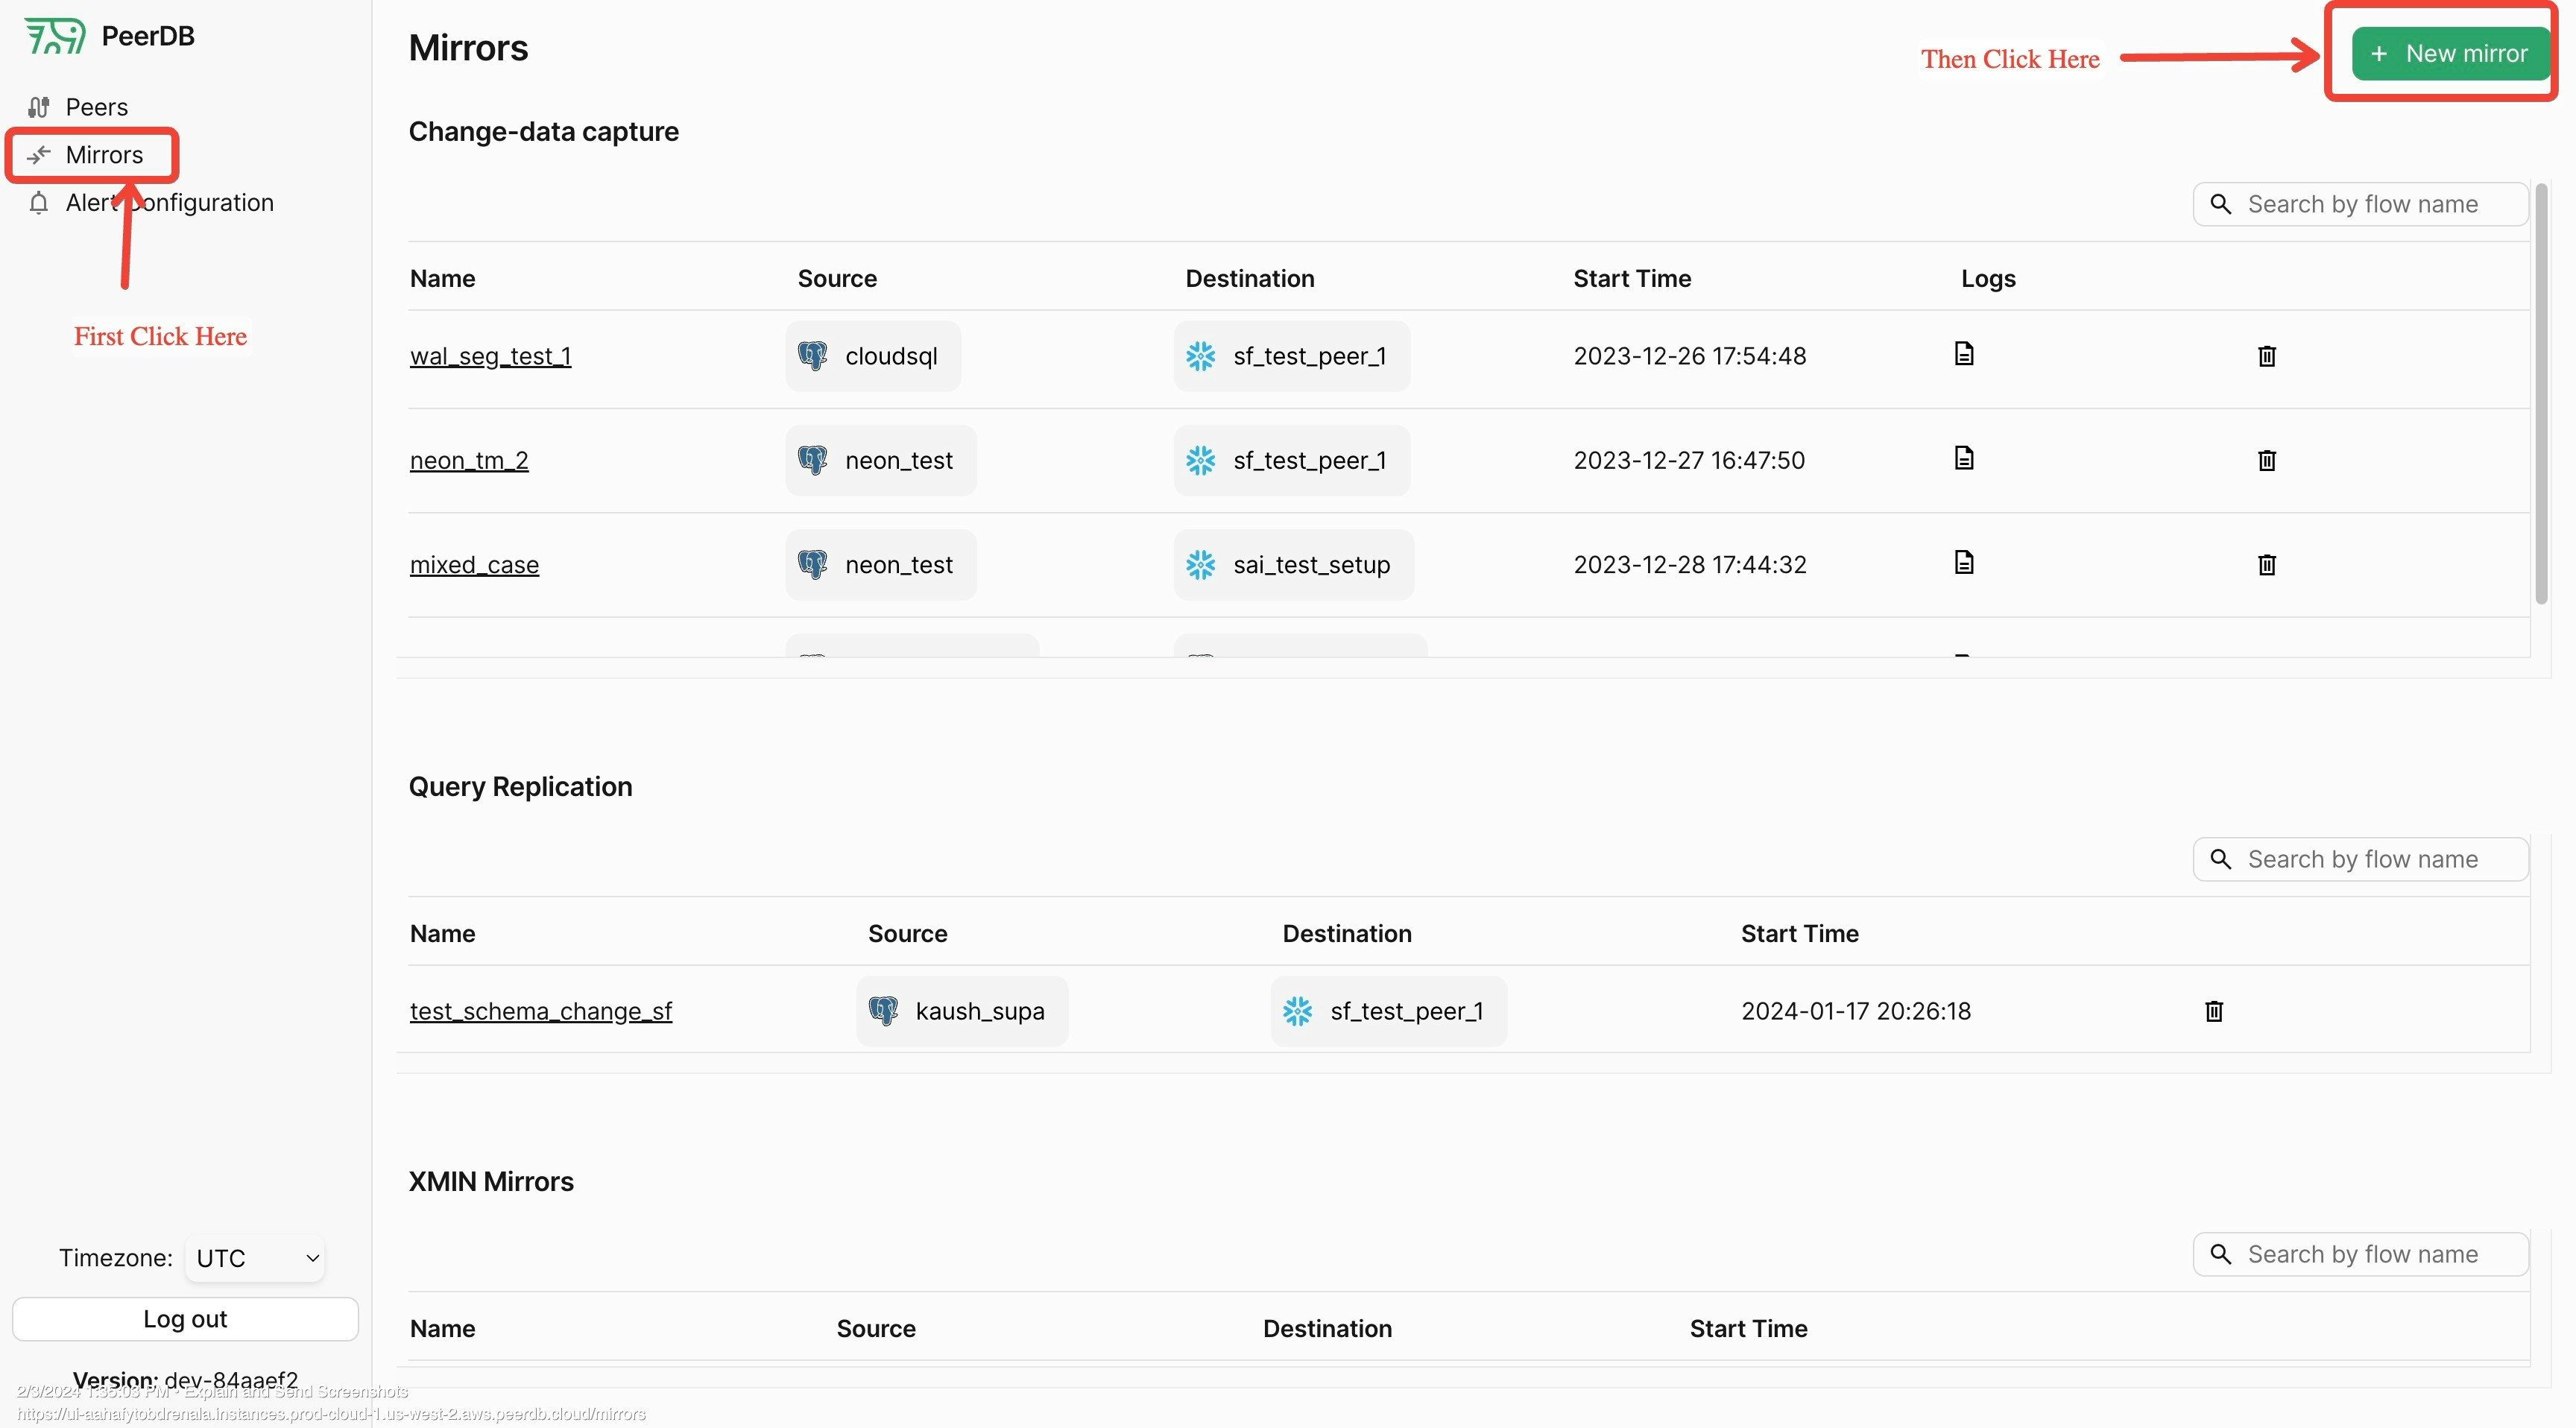
Create Mirror Screen
Click on Mirrors tab and then enter new Mirror screen
2
Mirror Type
Since in this walk through we are focussing on CDC based replication, choose CDC as the mirror type.
3
Mirror Name
Enter a unique identifier for the mirror name. This is used to identify the mirror in the PeerDB UI. Make this alpha numeric and without any special characters except underscore. Typically users use something like: prod_pg_to_clickhouse_v1 or dev_pg_to_clickhouse.
4
Select Source and Destination Peers
Select the source and destination peers that you created in the prerequisites in the drop down.
source and destination drop down
5
Mirror Configuration
Initial Snapshot: Selecting this option will do a full initial load of all the selected tables from your database. This is useful when you are setting up the mirror for the first time. Default is enabled.
Sync Interval (Seconds): This is the interval at which PeerDB will poll the source database for changes. Default is 60 seconds. This has implication on the warehouse activity, for cost-sensitive users we recommend to keep this at a higher value (over 3600).
Publication Name: This is the name of the publication that you created in the source database. This is used to capture changes from the source database. If you have not created a publication, you can leave this blank and PeerDB will create a publication for you. If you have not created a publication, you can leave this blank and PeerDB will create a publication for you. If you have already created a publication dedicated to peerdb (peerdb_publication), don’t forget adding that in this field.
Replication Slot Name: This is the name of the replication slot that you created in the source database. This is used to capture changes from the source database. If you have not created a replication slot, you can leave this blank and PeerDB will create a replication slot for you.
Snapshot Number of Rows Per Partition: This is the number of rows that will be fetched in each partition during the initial snapshot. Default is 500000. This is useful when you have a large number of rows in your tables and you want to control the number of rows fetched in each partition.
Snapshot Maximum Parallel Workers: This is the number of parallel workers that will be used to fetch the initial snapshot. Default is 1. This is useful when you have a large number of tables and you want to control the number of parallel workers used to fetch the initial snapshot. This setting is per-table.
Snapshot Number of Tables In Parallel: This is the number of tables that will be fetched in parallel during the initial snapshot. Default is 4. This is useful when you have a large number of tables and you want to control the number of tables fetched in parallel.
Soft Delete: This is set to false by default. If you want to capture soft deletes, you can set this to true. This will add a _peerdb_is_deleted column to the destination table and set it to true when a row is deleted in the source table without actually deleting the row in the destination table.
6
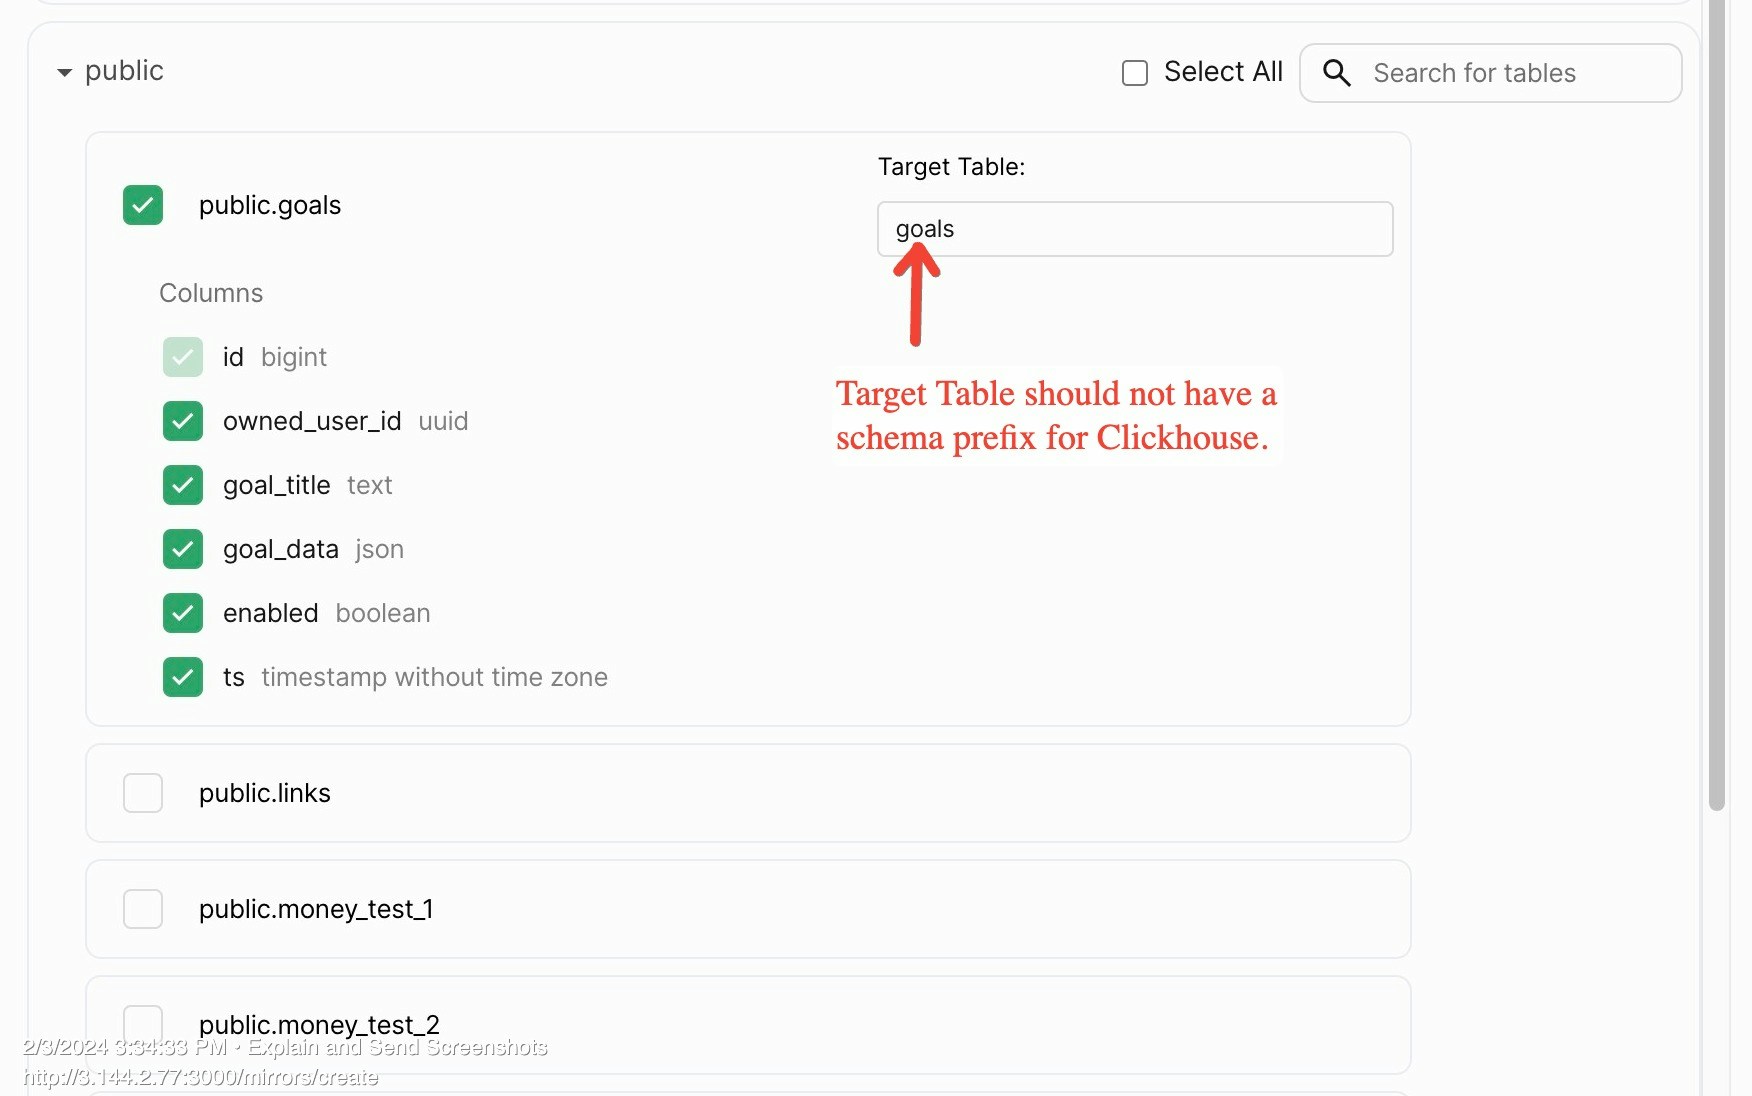
Table Selection
Select the tables that you want to replicate from the source database to the destination database. You can use the search bar to search for the tables. You can also use the filter to filter the tables based on the schema.
Table Selection
7
Review and Create
Review the mirror configuration and click on the Validate Mirror button. If there are any errors, you will see them on the screen. If there are no errors, you will see a success message. Once you see the success message, click on the Create Mirror button to create the mirror ✨.
Once you’ve moved data from Postgres to ClickHouse, the next obvious question is how to model your data in ClickHouse to make the most of it. Please refer to this page on ClickHouse Data Modeling Tips for Postgres users to help you model data in ClickHouse.
This is especially important as ClickHouse differs from Postgres, and you might encounter some surprises. This guide helps address potential pitfalls and ensures you can take full advantage of ClickHouse.
If Ordering Key in ClickHouse is different from PRIMARY KEY in Postgres
If you are defining a Ordering Key in ClickHouse differently from the Primary Key in Postgres, please don’t forget to read all the considerations around it!
When replicating data from PostgreSQL to ClickHouse, it’s important to understand the limitations and special considerations for TOAST (The Oversized-Attribute Storage Technique) columns. This guide will help you identify and properly handle TOAST columns in your replication process.
Please refer to this page on Handling TOAST Columns to help you handle TOAST columns in your replication process.