Deploying PeerDB
We currently support deploying and testing PeerDB using our Docker Compose file.
Docker can be installed by referring to these instructions.
The docker compose tool should also be present. The Postgres client tools (specifically
psql) are used to test the PeerDB installation. git clone --recursive https://github.com/PeerDB-io/peerdb.git
cd peerdb
# Run docker containers: peerdb-server, postgres as catalog, temporal.
# This might take a few minutes, so get a cup of coffee! :)
./run-peerdb.sh
Quickstart
The following steps assume you have PeerDB running locally. We also need psql installed and available on your
PATH.
Setup
This script reuses the PeerDB internal Postgres instance to setup two databases, which we can use to create two peers. It also creates some tables on both databases to use later in the quickstart. Run the following commands in your terminal:
curl -O https://raw.githubusercontent.com/PeerDB-io/peerdb/main/quickstart_prepare_peers.sh
chmod +x quickstart_prepare_peers.sh
./quickstart_prepare_peers.sh
Creating Peers
With PeerDB running, we can create our first peers.
Head over to localhost:3000 on your browser. This is the PeerDB Dashboard.
Clicking on Peers in the sidebar will take us to the Peers page.
Let’s click on the Create Peer button at the top right to get started.
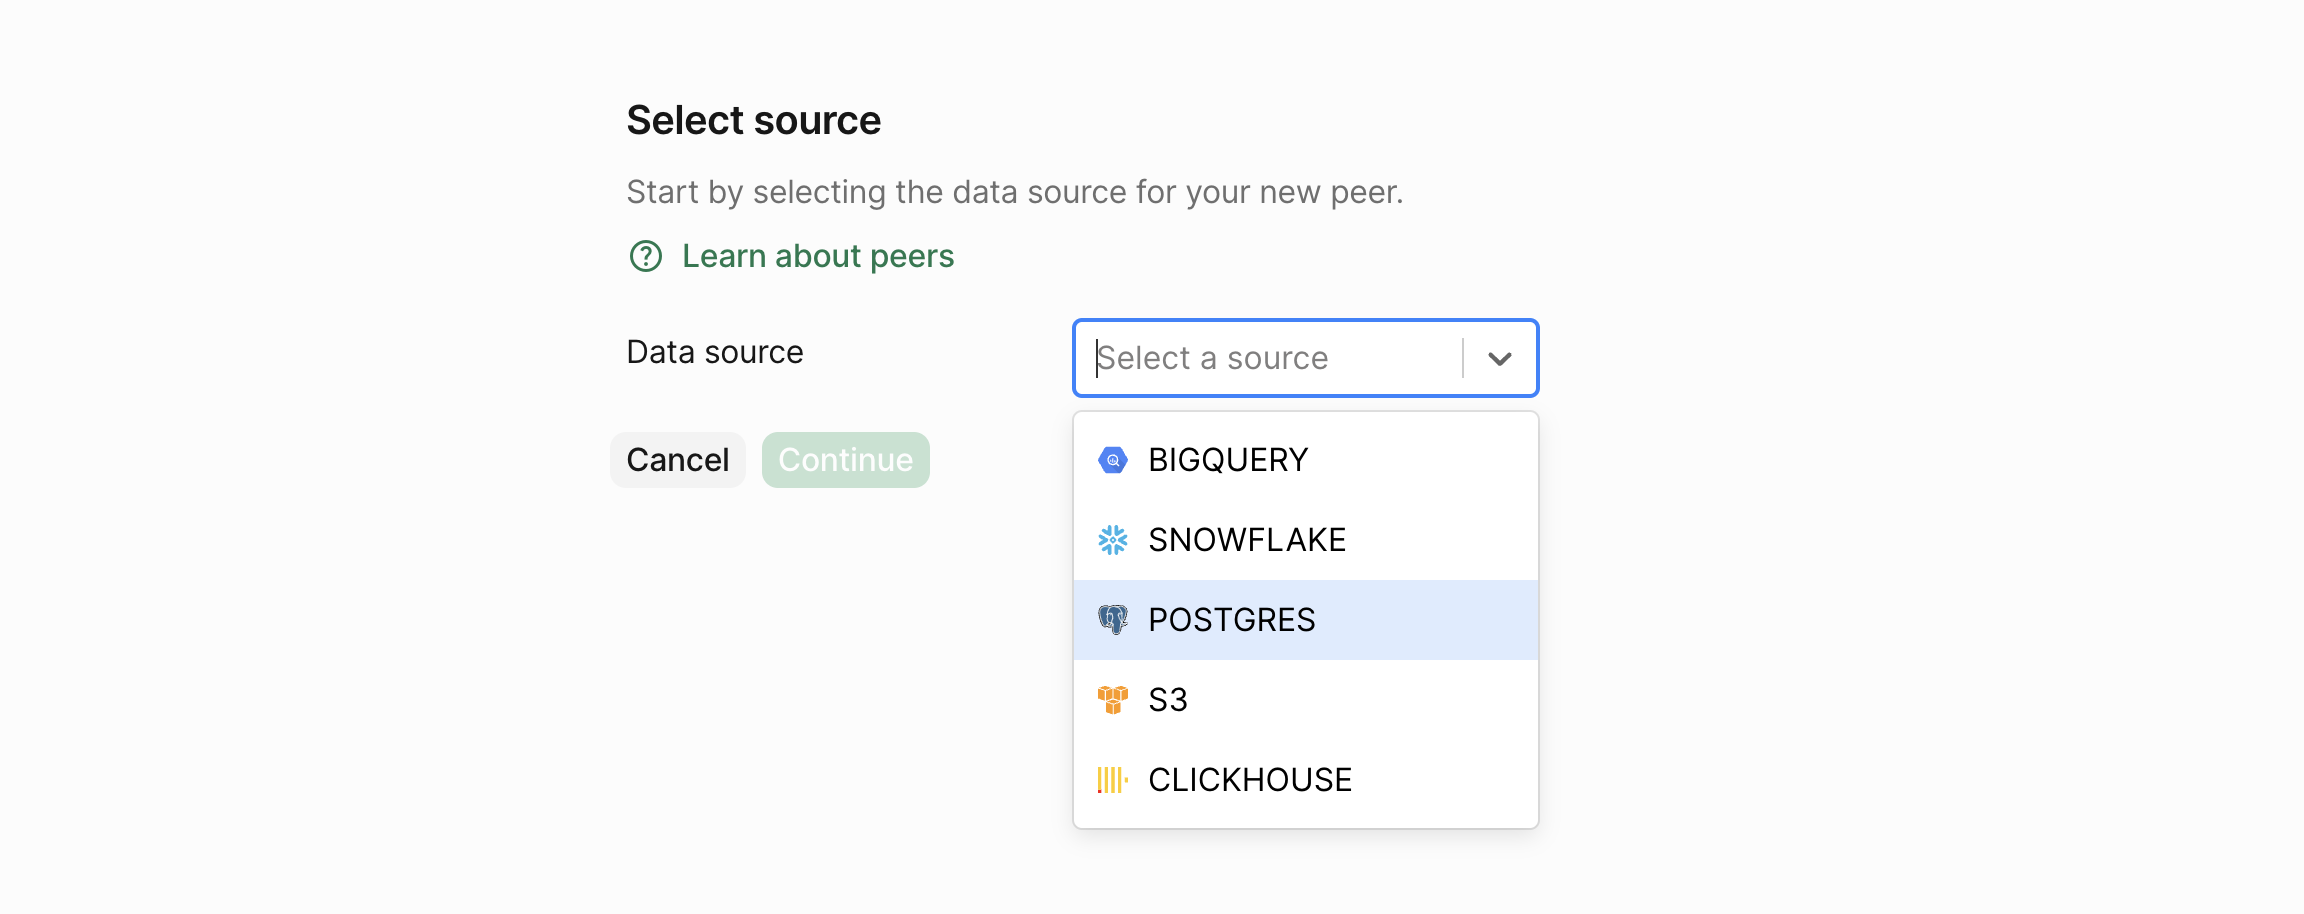
 Now, we select the data store for which we wish to create a peer. Let’s select Postgres and click on the Continue button.
 This takes to a form where we can fill in the details for the peer. Let’s fill in the details of our PostgreSQL peer.
Fill in the password as
 postgres.
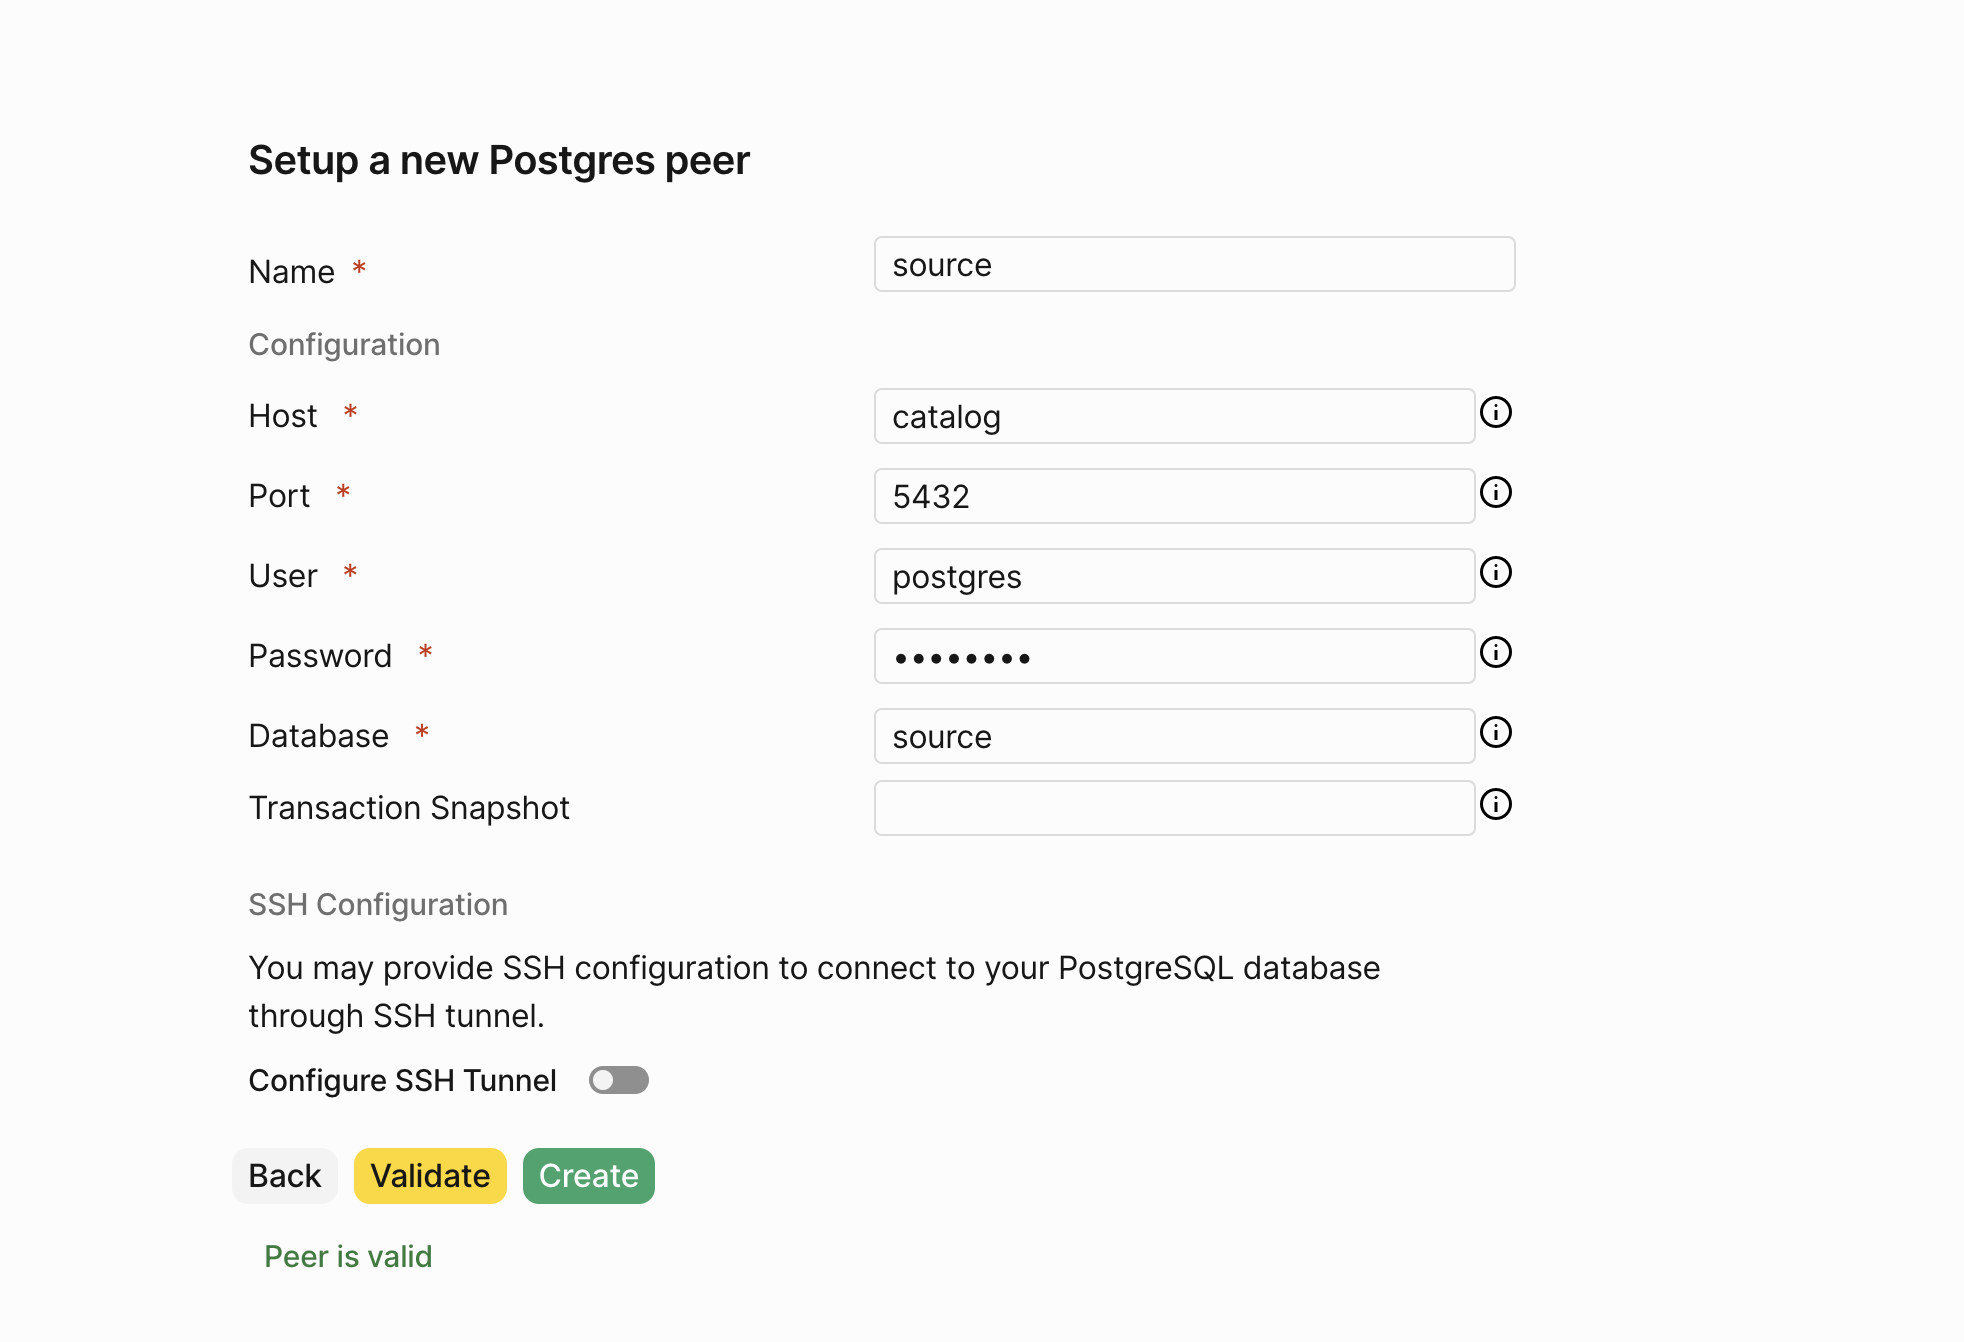 PeerDB validates the connection details and if everything is correct, clicking on Validate should show a success message.
Finally, click on Create to create the peer.
We now have our source PostgreSQL peer ready.
Let’s create the target PostgreSQL peer by repeating the exact same steps.
Fill in the password as
 postgres.
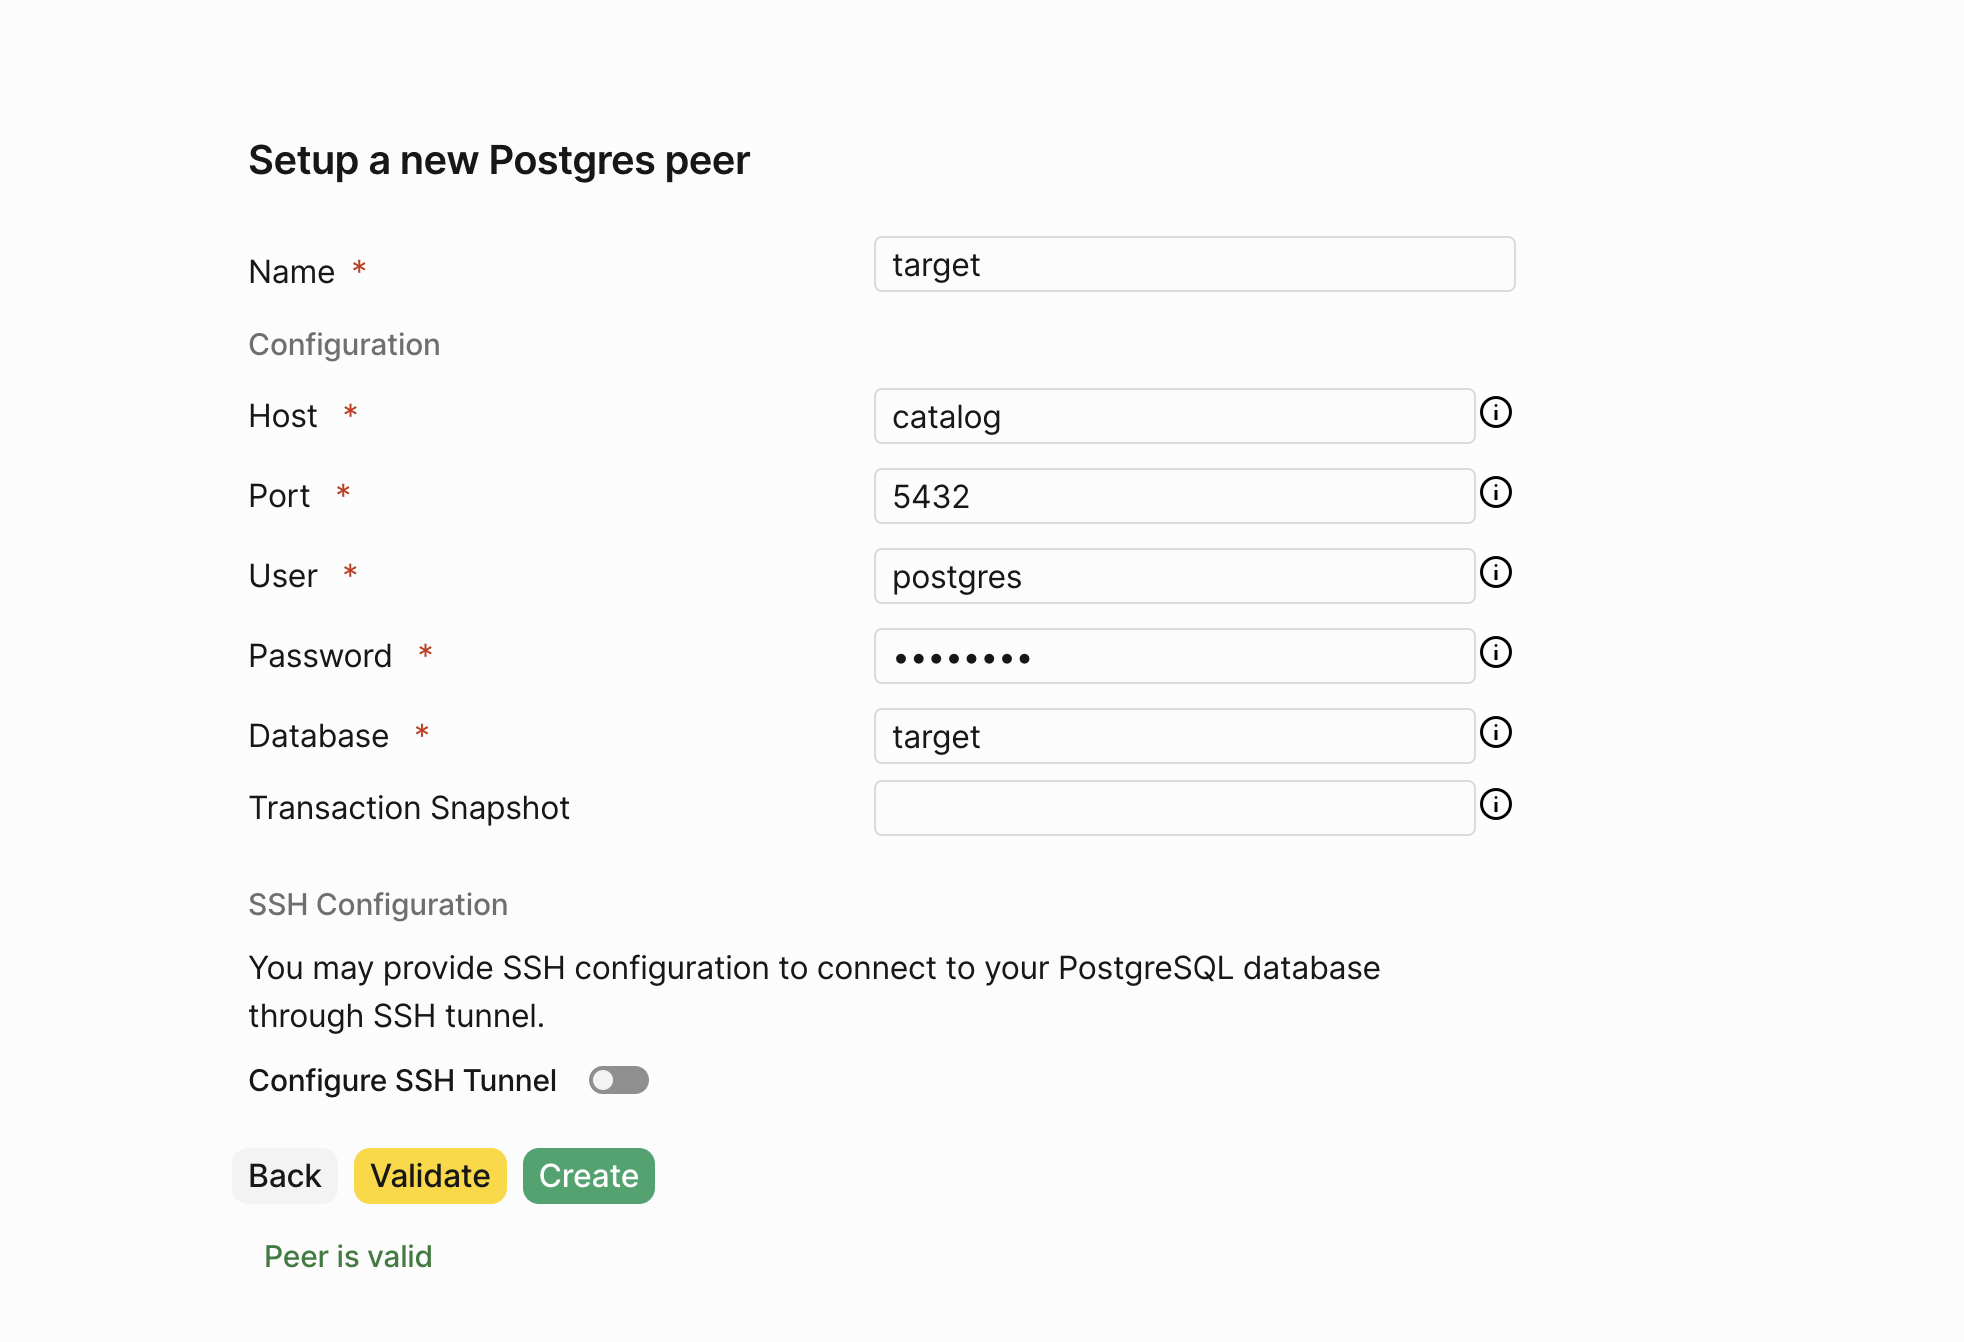 Now that we have our source and target peers ready, let’s move on to creating a mirror.
 Clicking on Mirrors in the sidebar will take us to the Mirrors page.
Real-time CDC
To kick off Change Data Capture (CDC) based streaming from source peer to target peer, let’s click on New Mirror.
 Let’s select the
 CDC box, and enter the name of the mirror and the two peers.
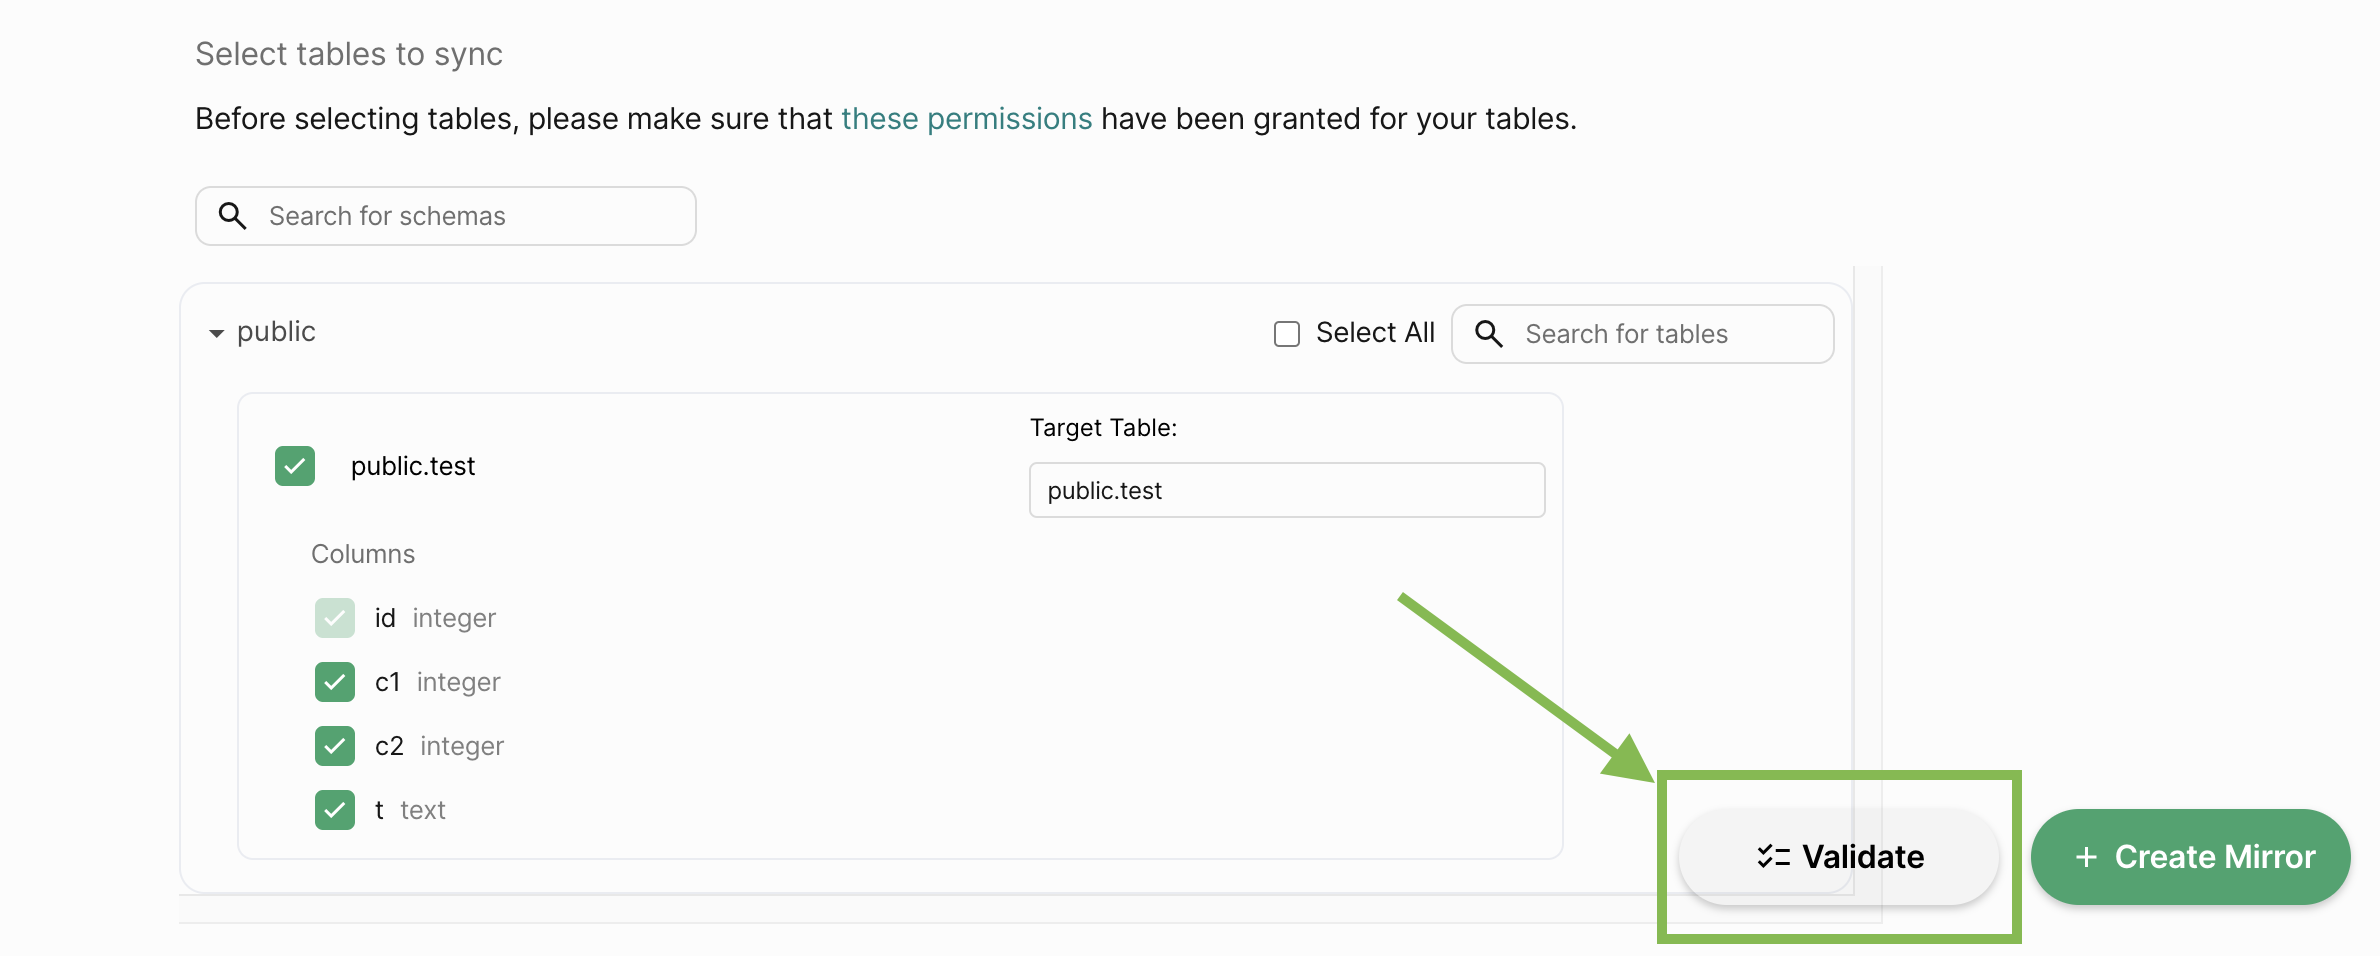
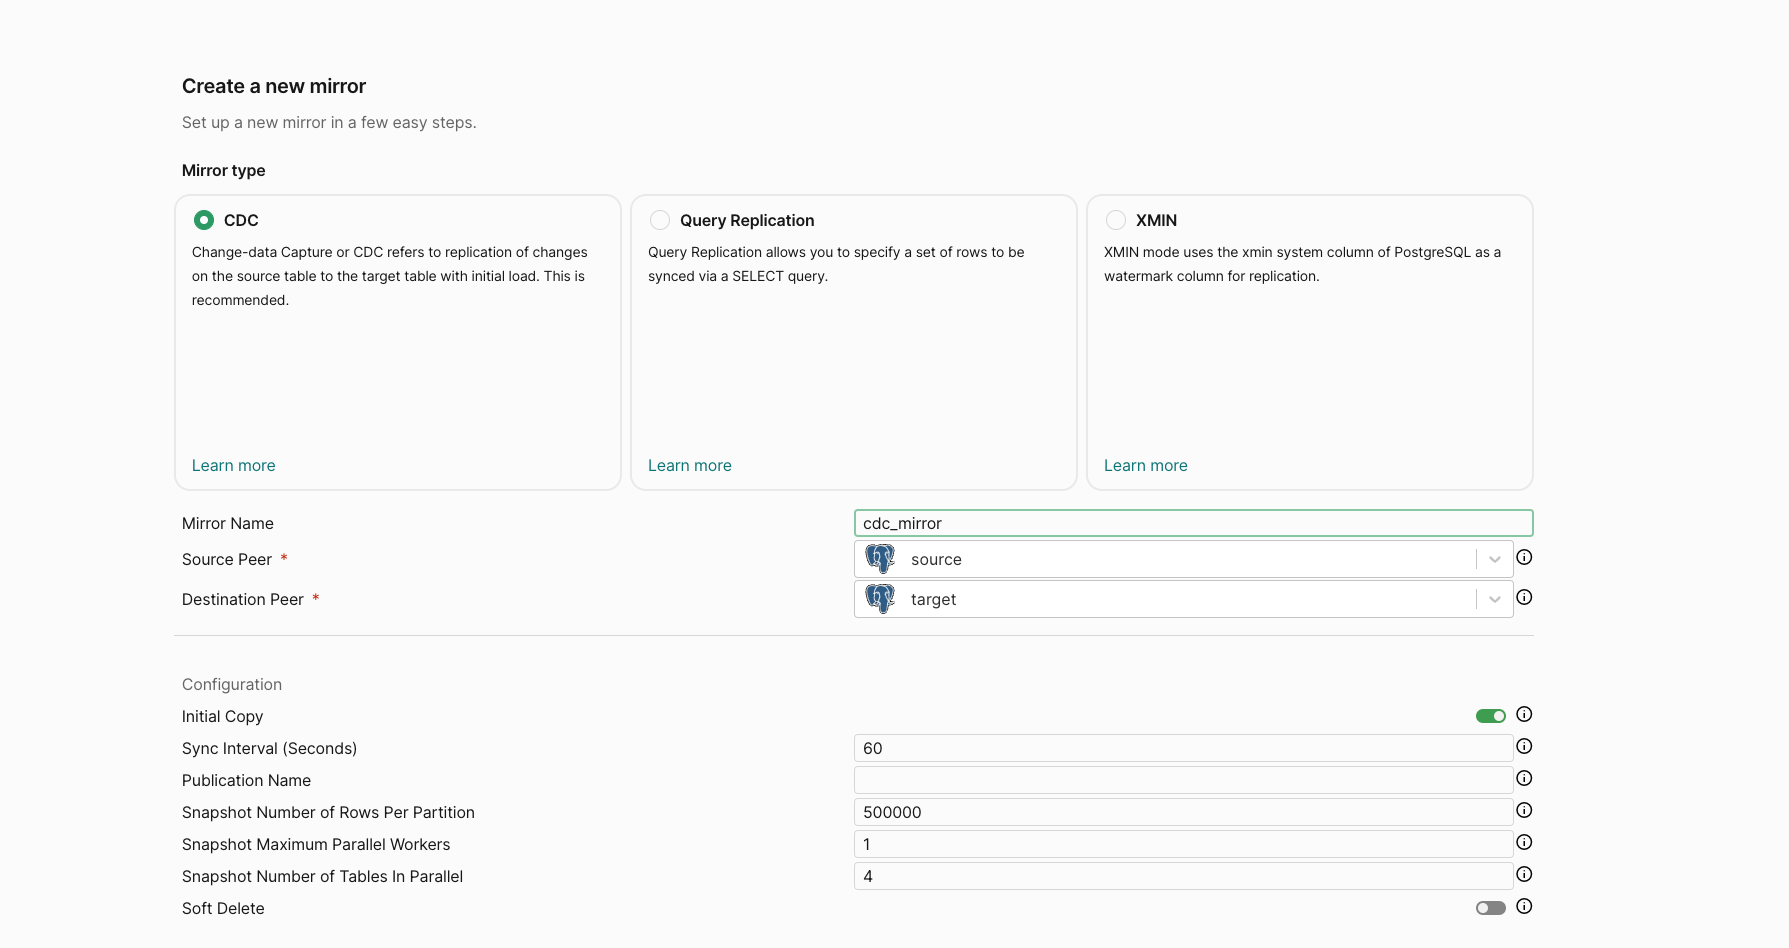 Scrolling down, we can see a section to a select the table on our source PostgreSQL peer to sync.
 Let’s select the table we have ready -
 public.test.
Now that we’ve filled in all the mirror details.
Let’s click on Validate to check if everything is set up correctly, much like we did when creating peers!
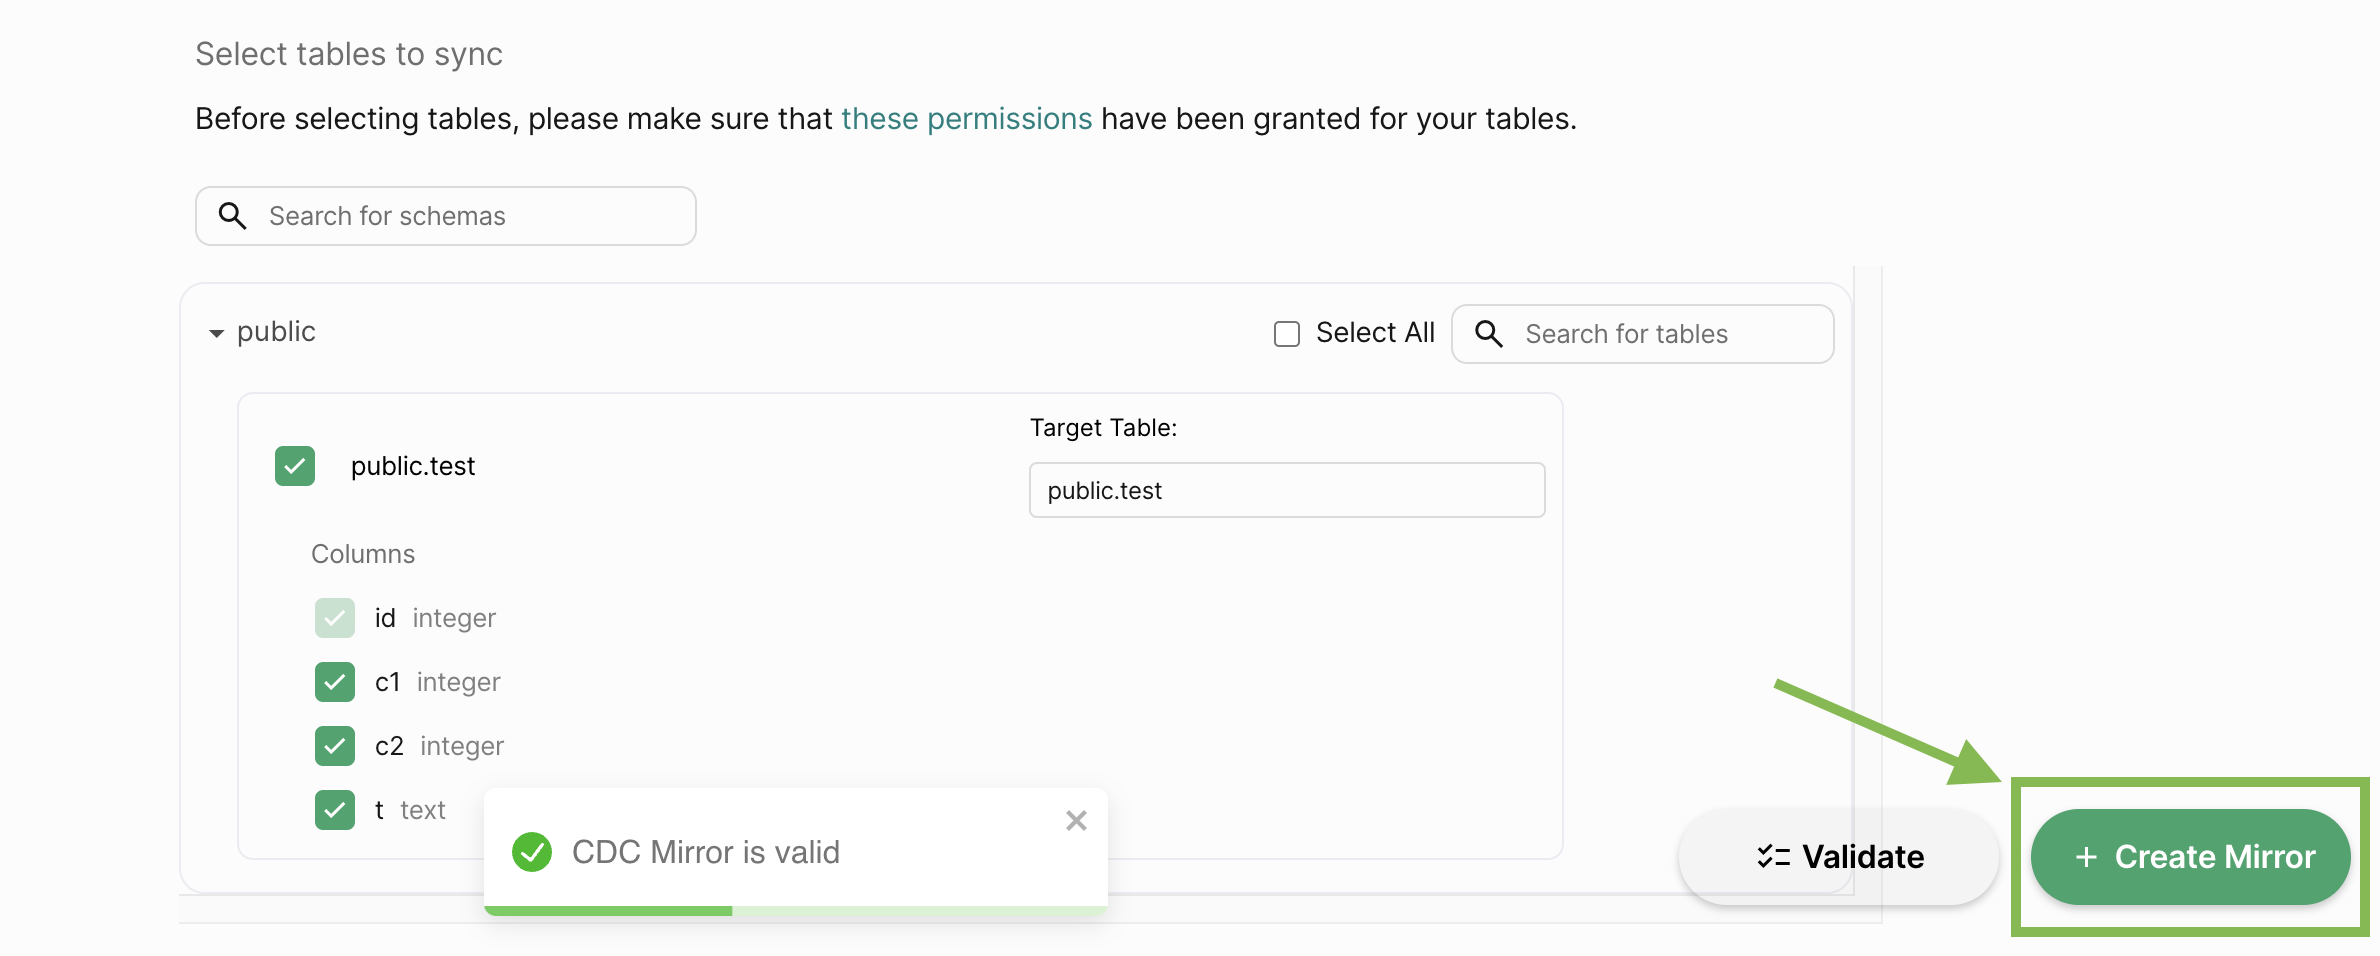
 Finally, click on Create to create the mirror.
 Now that our CDC mirror is set up, it will automatically replicate data from the source to the target peer. Let’s insert a row in the source table via PeerDB itself.
Connect to PeerDB via psql:
psql "port=9900 host=localhost password=peerdb"
--- Verify that the source table has zero rows
SELECT id,c1,c2,t FROM source.public.test;
--- Insert a row into the source table
INSERT INTO source.public.test(c1, c2, t) VALUES(1, 2, 'oathbringer');
Mirrors page which we landed on after creating the mirror:
 This takes to the Mirror Overview page. Let’s click on the Sync Status tab, where we can see the status of the mirror and the number of rows replicated:
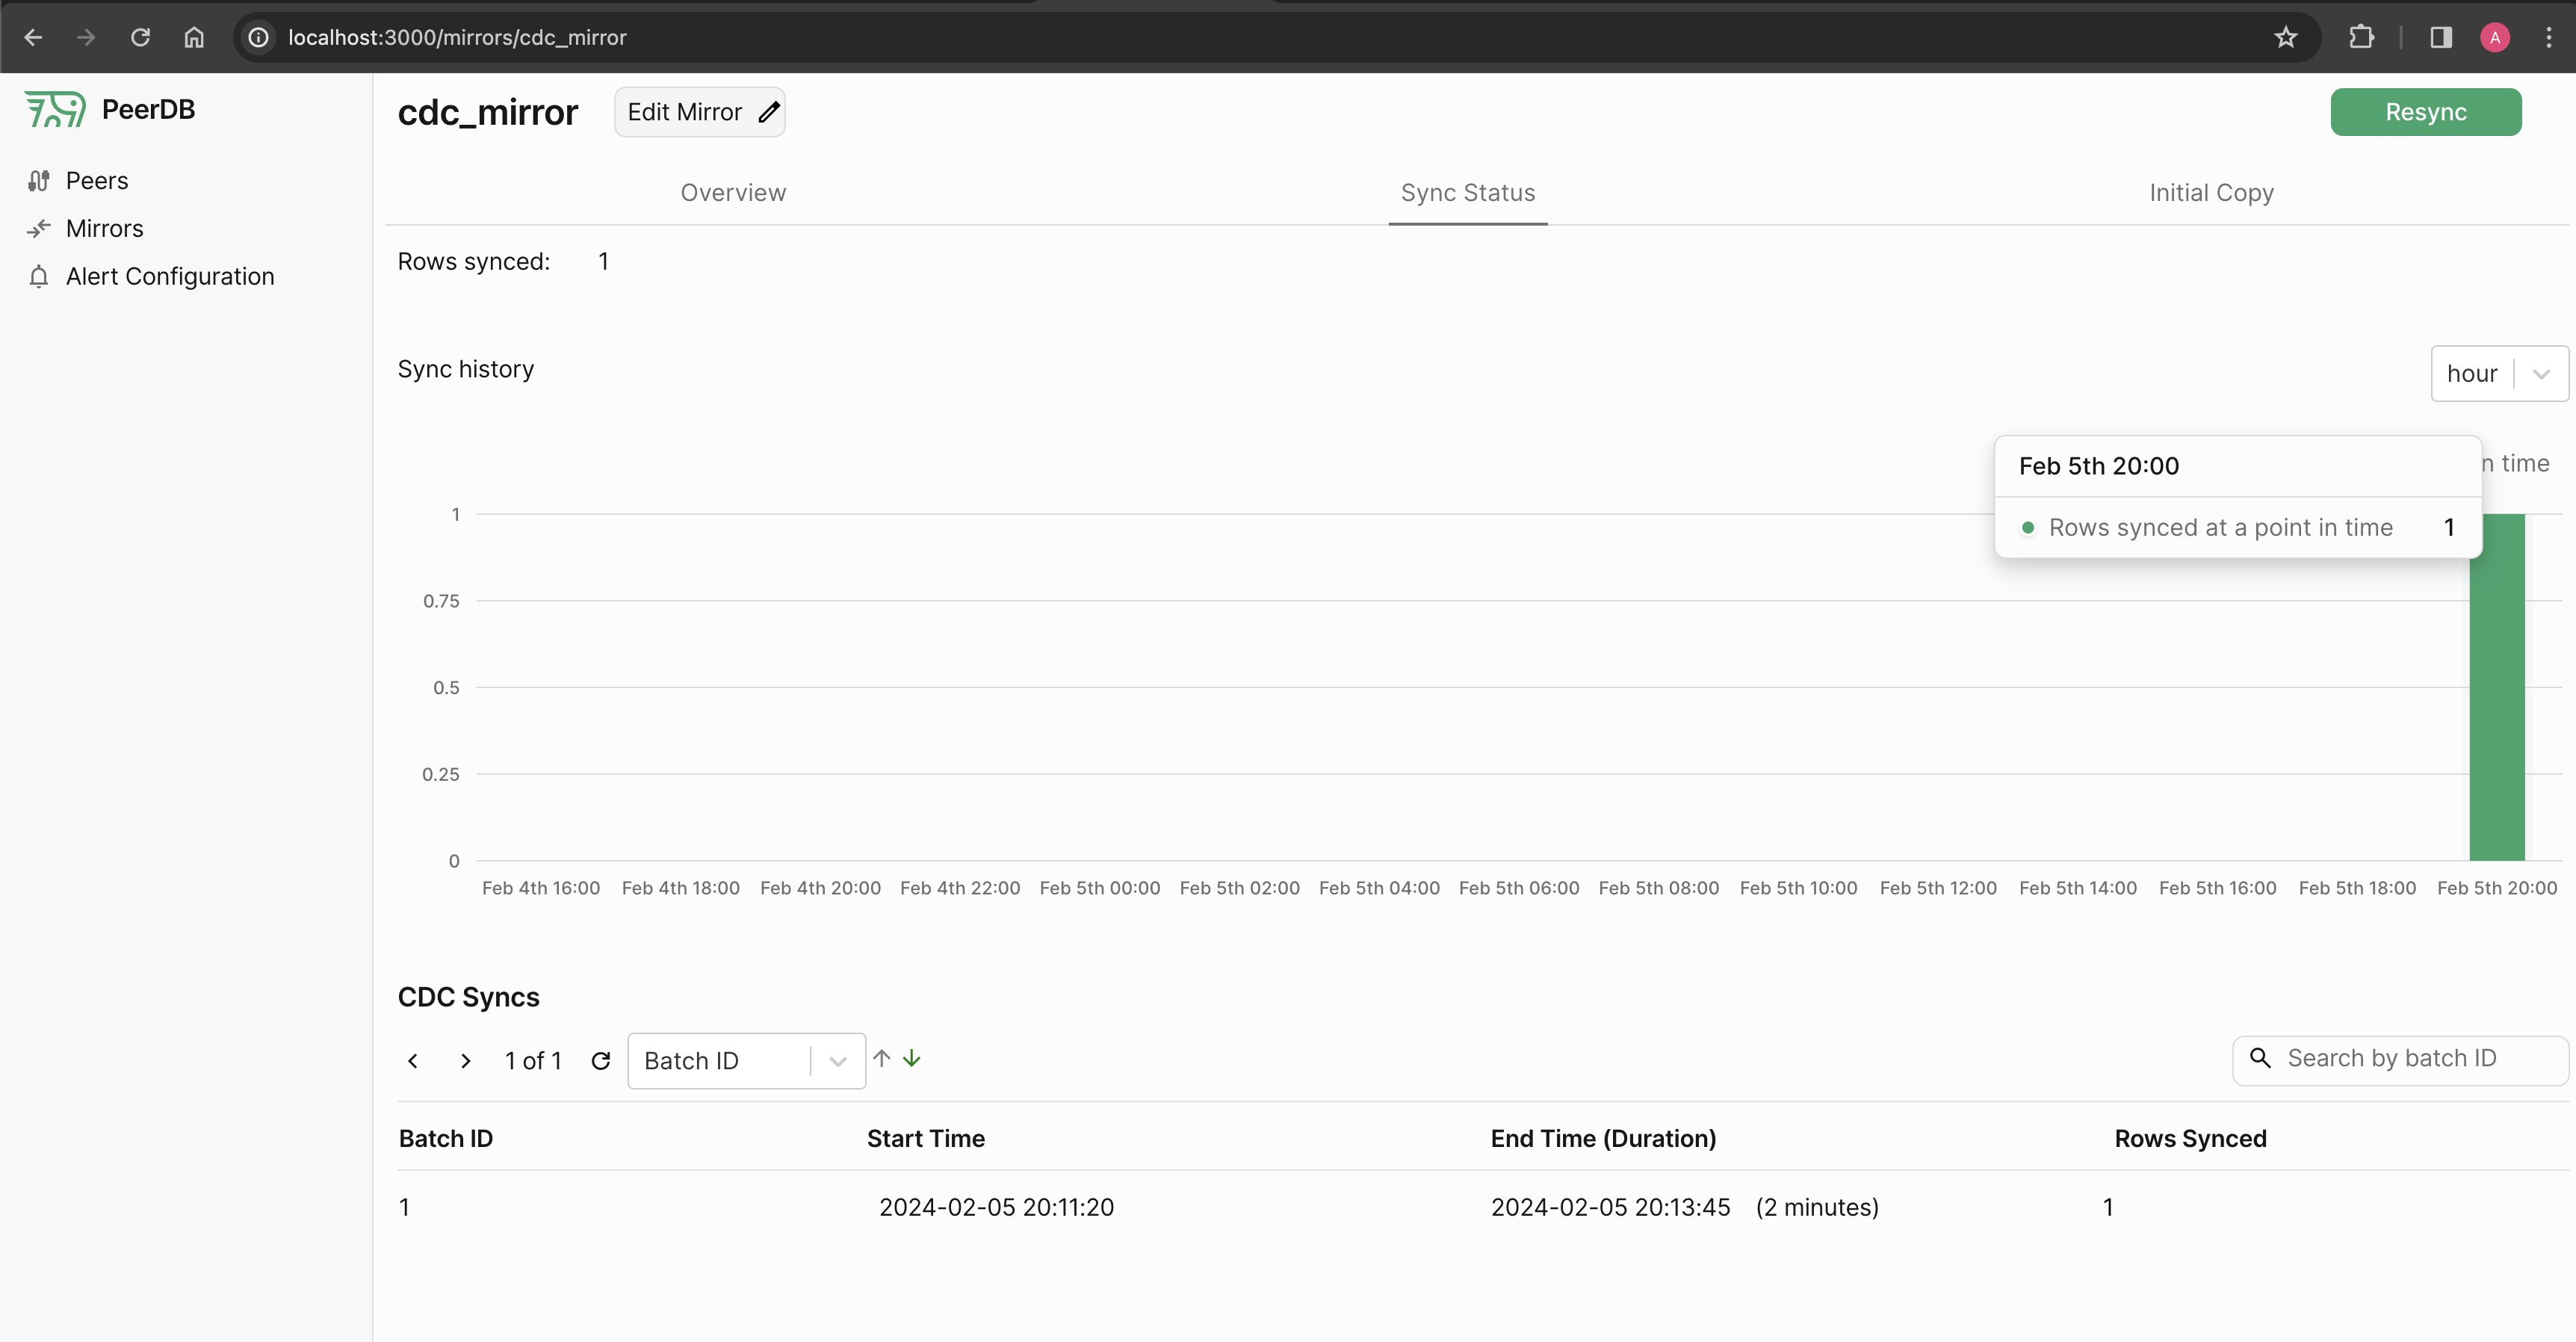 We can see that the mirror has successfully replicated the row from the source to the target peer. Let’s verify this by querying the target table.
--- CDC mirrors replicate data as-is, so the row should be identical.
SELECT id,c1,c2,t FROM target.public.test;
peerdb=> SELECT id,c1,c2,t FROM target.public.test;
id | c1 | c2 |      t
----+----+----+-------------
1 |  1 |  2 | oathbringer
(1 row)
INSERT, UPDATE, DELETE) from source to target.
FAQ
If you have any questions about the PeerDB setup and deployment process, don’t hesitate to reach out on Slack. We’re more than happy to assist and answer any questions, including:
- What is the performance I can expect during CDC and query based replication?
- How do I know my data sync is successful?
- Can I set a specific time to start my data sync?
If there are any unanswered questions, we’d love to help you get started. Feel free to ask your questions on our community Slack channel.
In addition to this, if you require direct access to our team for any assistance, don’t hesitate to contact us to discuss our premium support offerings.


