> ## Documentation Index
> Fetch the complete documentation index at: https://docs.peerdb.io/llms.txt
> Use this file to discover all available pages before exploring further.
# Supabase Postgres Source Setup Guide
This is a guide on how to create a Supabase PostgreSQL peer which you can use for replication in PeerDB.
PeerDB Cloud supports Supabase via IPv6 natively for seemless replication.
Let's create a new user for PeerDB with the necessary permissions suitable for CDC,
and also create a publication that we'll use for replication. For this, you can head over to the **SQL Editor** for your Supabase Project.
1. Create a dedicated user for PeerDB:
1. ```sql theme={null}
CREATE USER peerdb_user PASSWORD 'some-password';
```
2. Grant schema-level, read-only access to the user you created in the previous step. The following example shows permissions for the `public` schema. Repeat these commands for each schema containing tables you want to replicate:
1. ```sql theme={null}
GRANT USAGE ON SCHEMA "public" TO peerdb_user;
GRANT SELECT ON ALL TABLES IN SCHEMA "public" TO peerdb_user;
ALTER DEFAULT PRIVILEGES IN SCHEMA "public" GRANT SELECT ON TABLES TO peerdb_user;
```
3. Grant replication privileges to the user:
1. ```sql theme={null}
ALTER USER peerdb_user WITH REPLICATION;
```
4. Create a [publication](https://www.postgresql.org/docs/current/logical-replication-publication.html) with the tables you want to replicate. We strongly recommend only including the tables you need in the publication to avoid performance overhead.
Any table included in the publication must either have a **primary key** defined *or* have its **replica identity** configured to `FULL`.
1. To create a publication for specific tables:
```sql theme={null}
CREATE PUBLICATION peerdb_publication FOR TABLE table_to_replicate, table_to_replicate2;
```
2. To create a publication for all tables in a specific schema:
```sql theme={null}
CREATE PUBLICATION peerdb_publication FOR TABLES IN SCHEMA "public";
```
The `peerdb_publication` publication will contain the set of change events generated from the specified tables, and will later be used to create the MIRROR (replication).
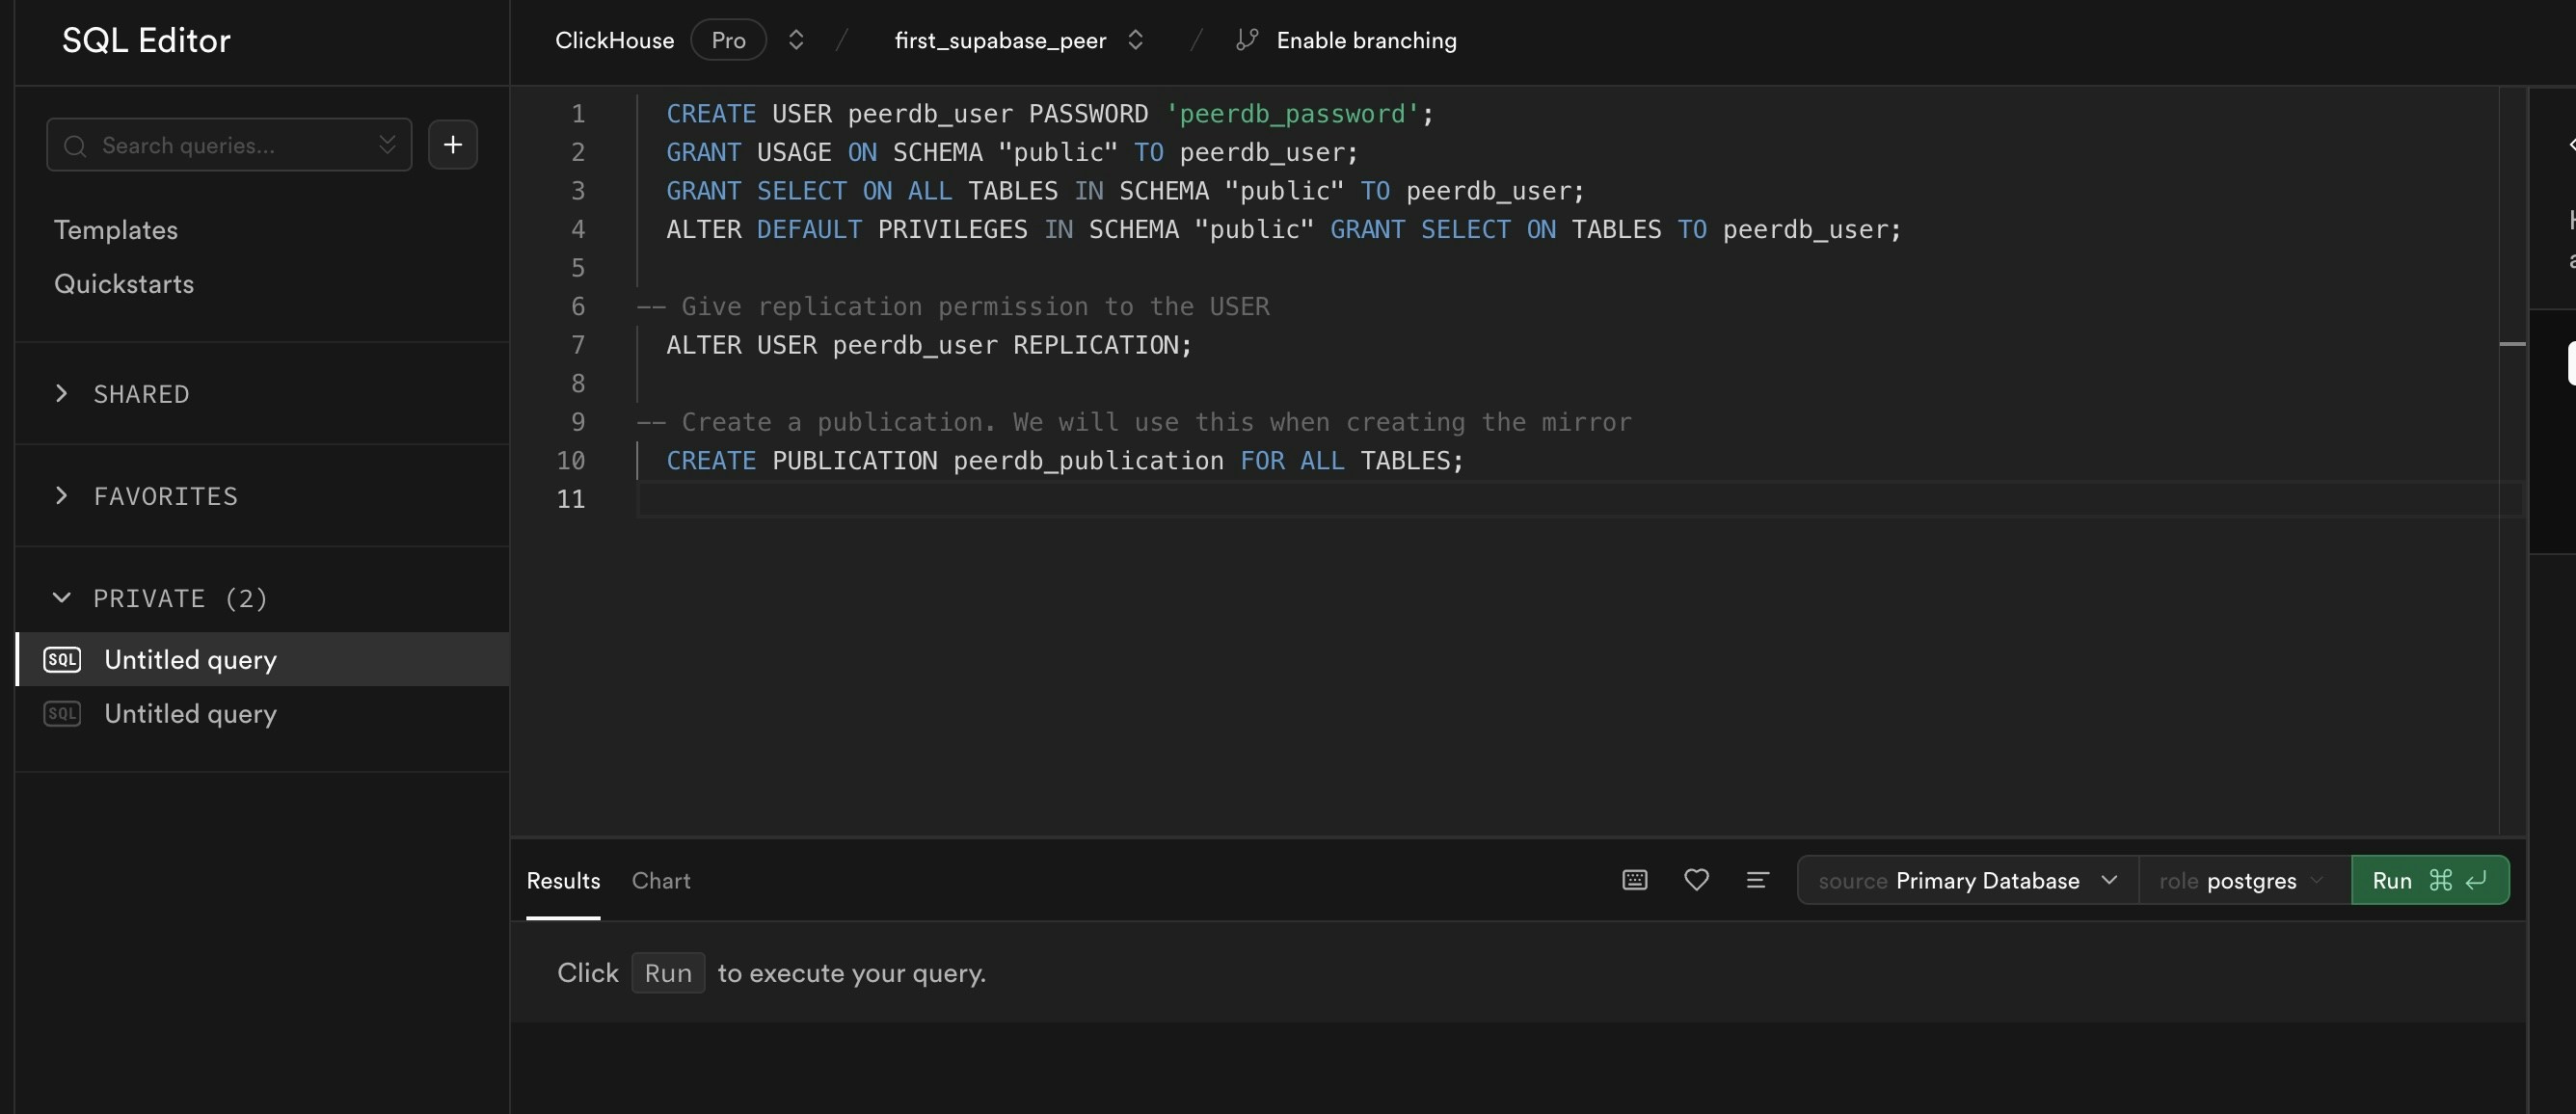 Click on **Run** to have a publication and a user ready.
The PeerDB user must not be restricted by RLS policies, as it can lead to missing data. You can disable RLS policies for the user by running the below command:
```sql theme={null}
ALTER USER peerdb_user BYPASSRLS;
```
Make sure to replace `peerdb_user` and `peerdb_password` with your desired username and password.
Also, remember to use the same publication name when creating the mirror in PeerDB.
1. Head over to your Supabase Project's `Project Settings` -> `Database` (under `Configuration`).
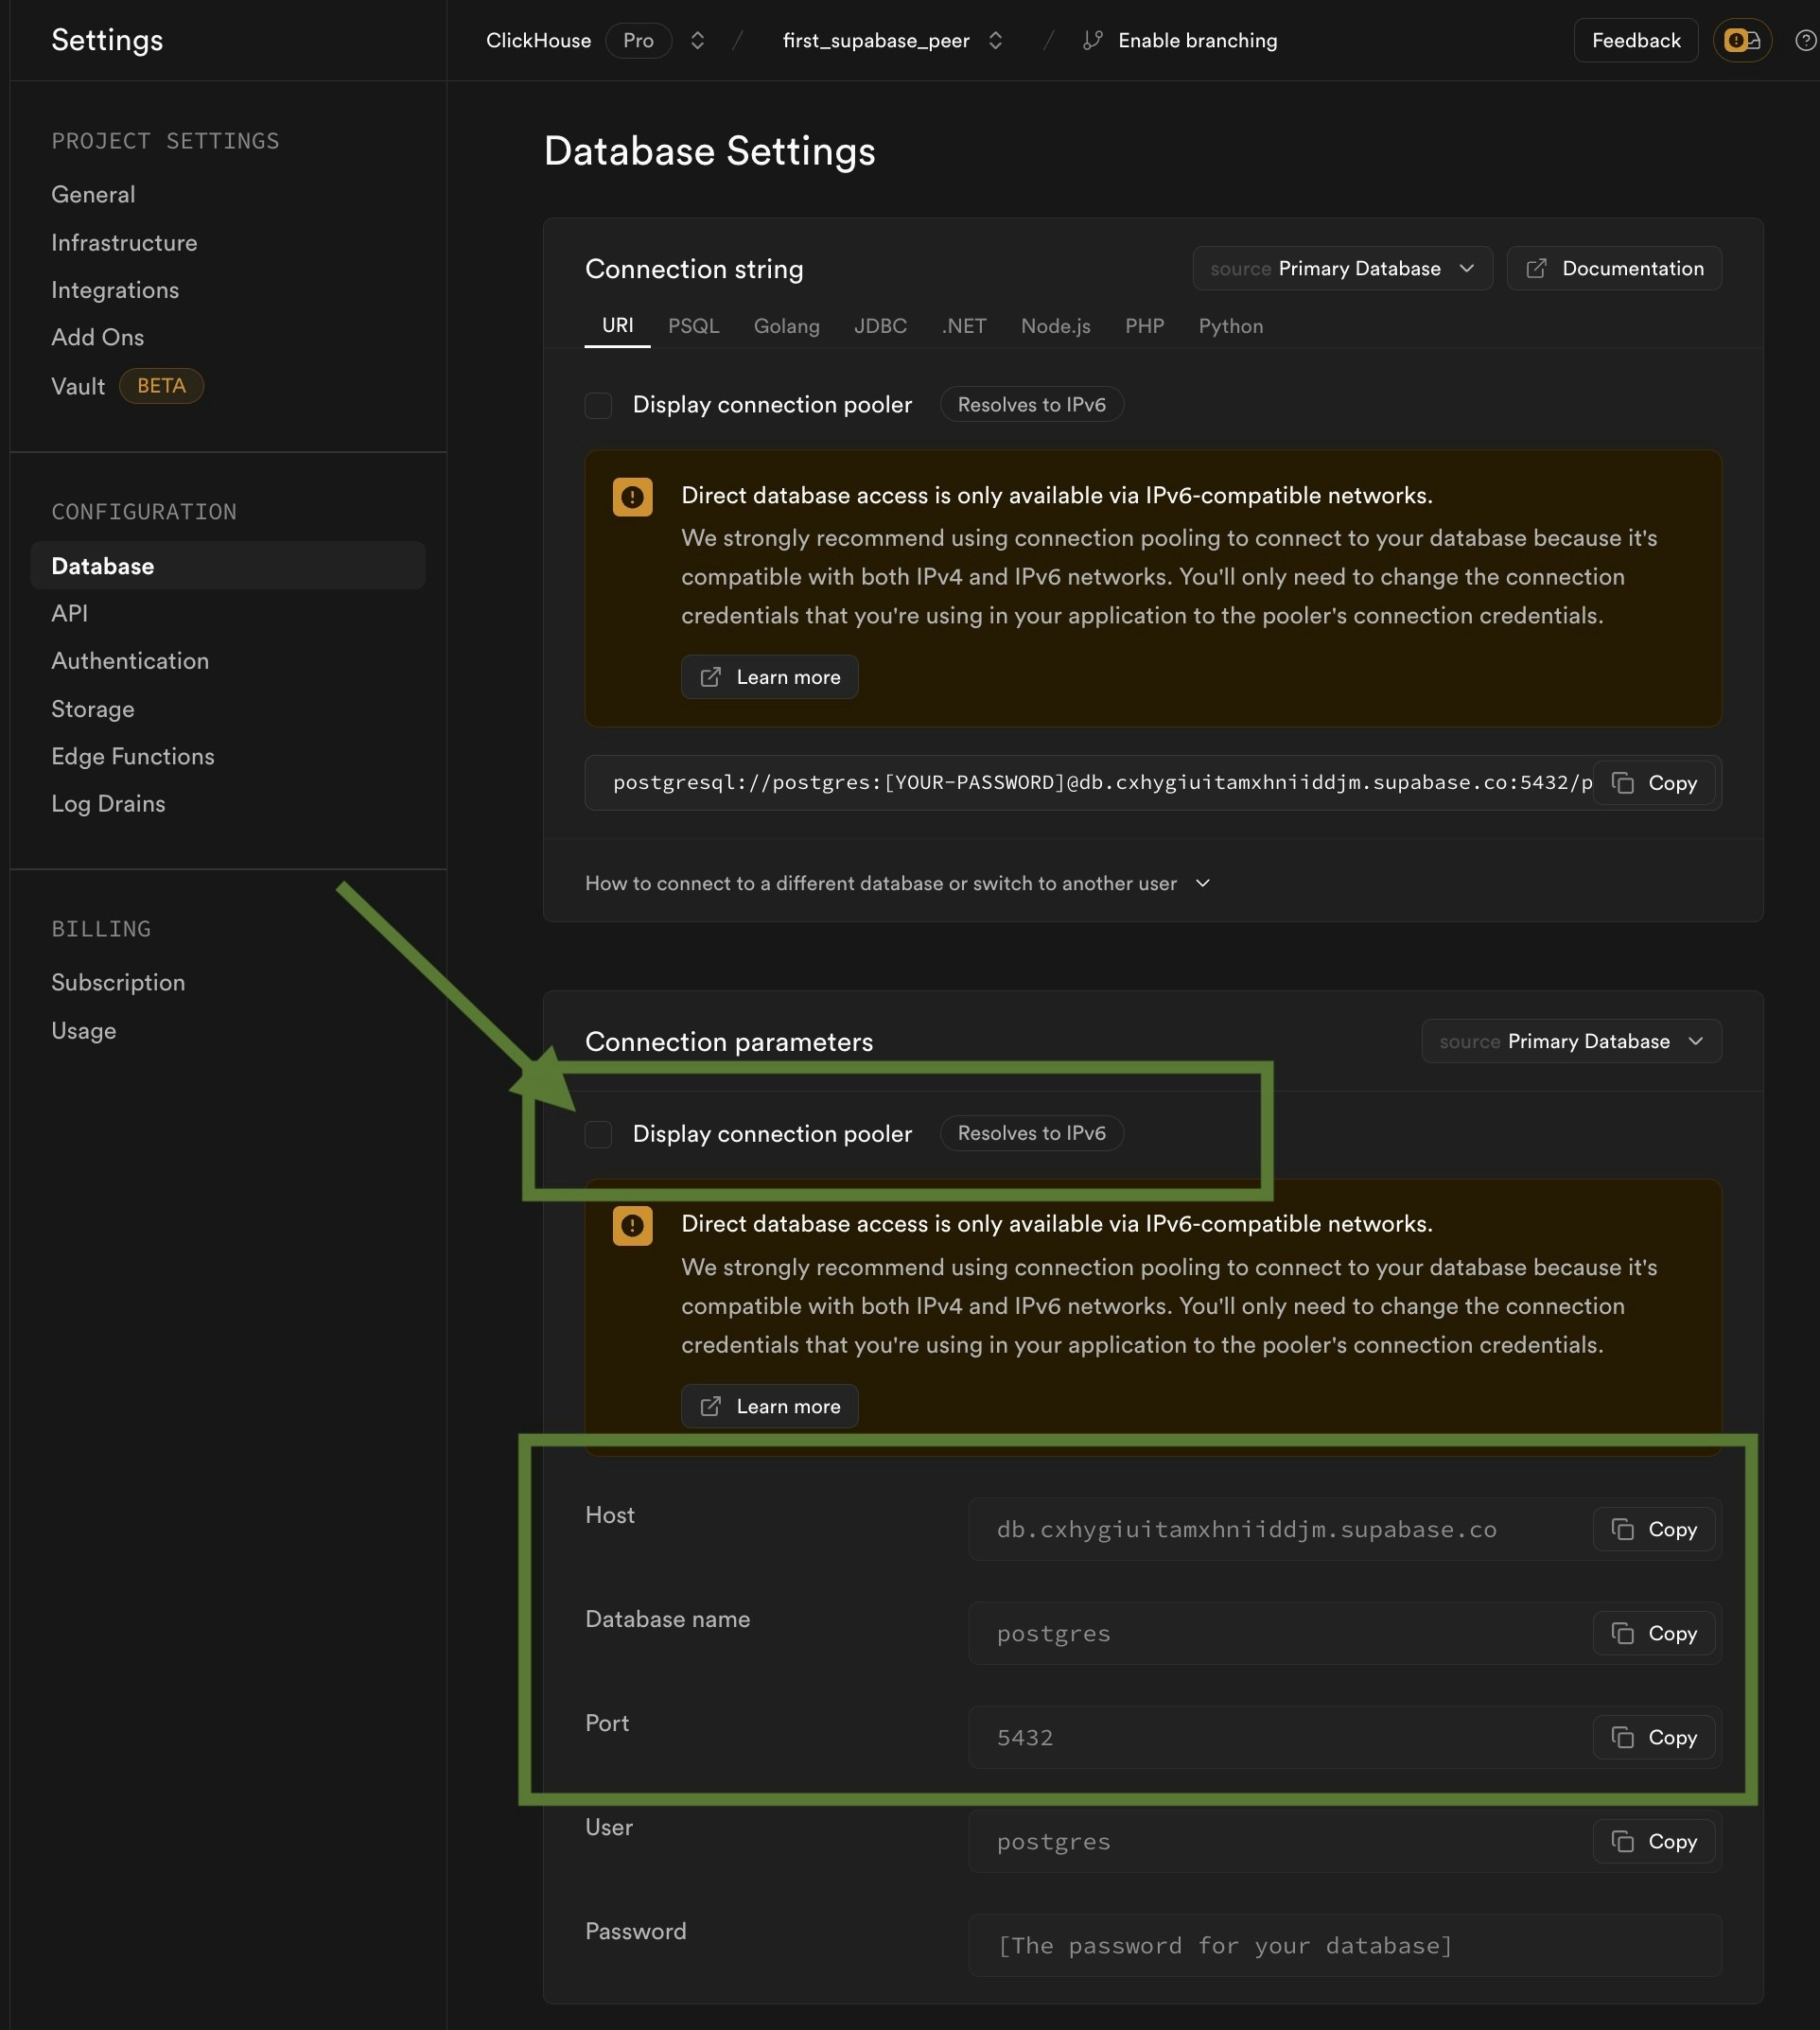
**Important**: Disable `Display connection pooler` on this page and head over to the `Connection parameters` section and note/copy the parameters.
Click on **Run** to have a publication and a user ready.
The PeerDB user must not be restricted by RLS policies, as it can lead to missing data. You can disable RLS policies for the user by running the below command:
```sql theme={null}
ALTER USER peerdb_user BYPASSRLS;
```
Make sure to replace `peerdb_user` and `peerdb_password` with your desired username and password.
Also, remember to use the same publication name when creating the mirror in PeerDB.
1. Head over to your Supabase Project's `Project Settings` -> `Database` (under `Configuration`).
**Important**: Disable `Display connection pooler` on this page and head over to the `Connection parameters` section and note/copy the parameters.
 2. Head over to PeerDB UI and click on **Create Peer**. Select **Postgres** as the source.
3. Now you can fill in the connection details you copied earlier, but make sure to use the username and password you created earlier in the SQL Editor in Step 1.
2. Head over to PeerDB UI and click on **Create Peer**. Select **Postgres** as the source.
3. Now you can fill in the connection details you copied earlier, but make sure to use the username and password you created earlier in the SQL Editor in Step 1.
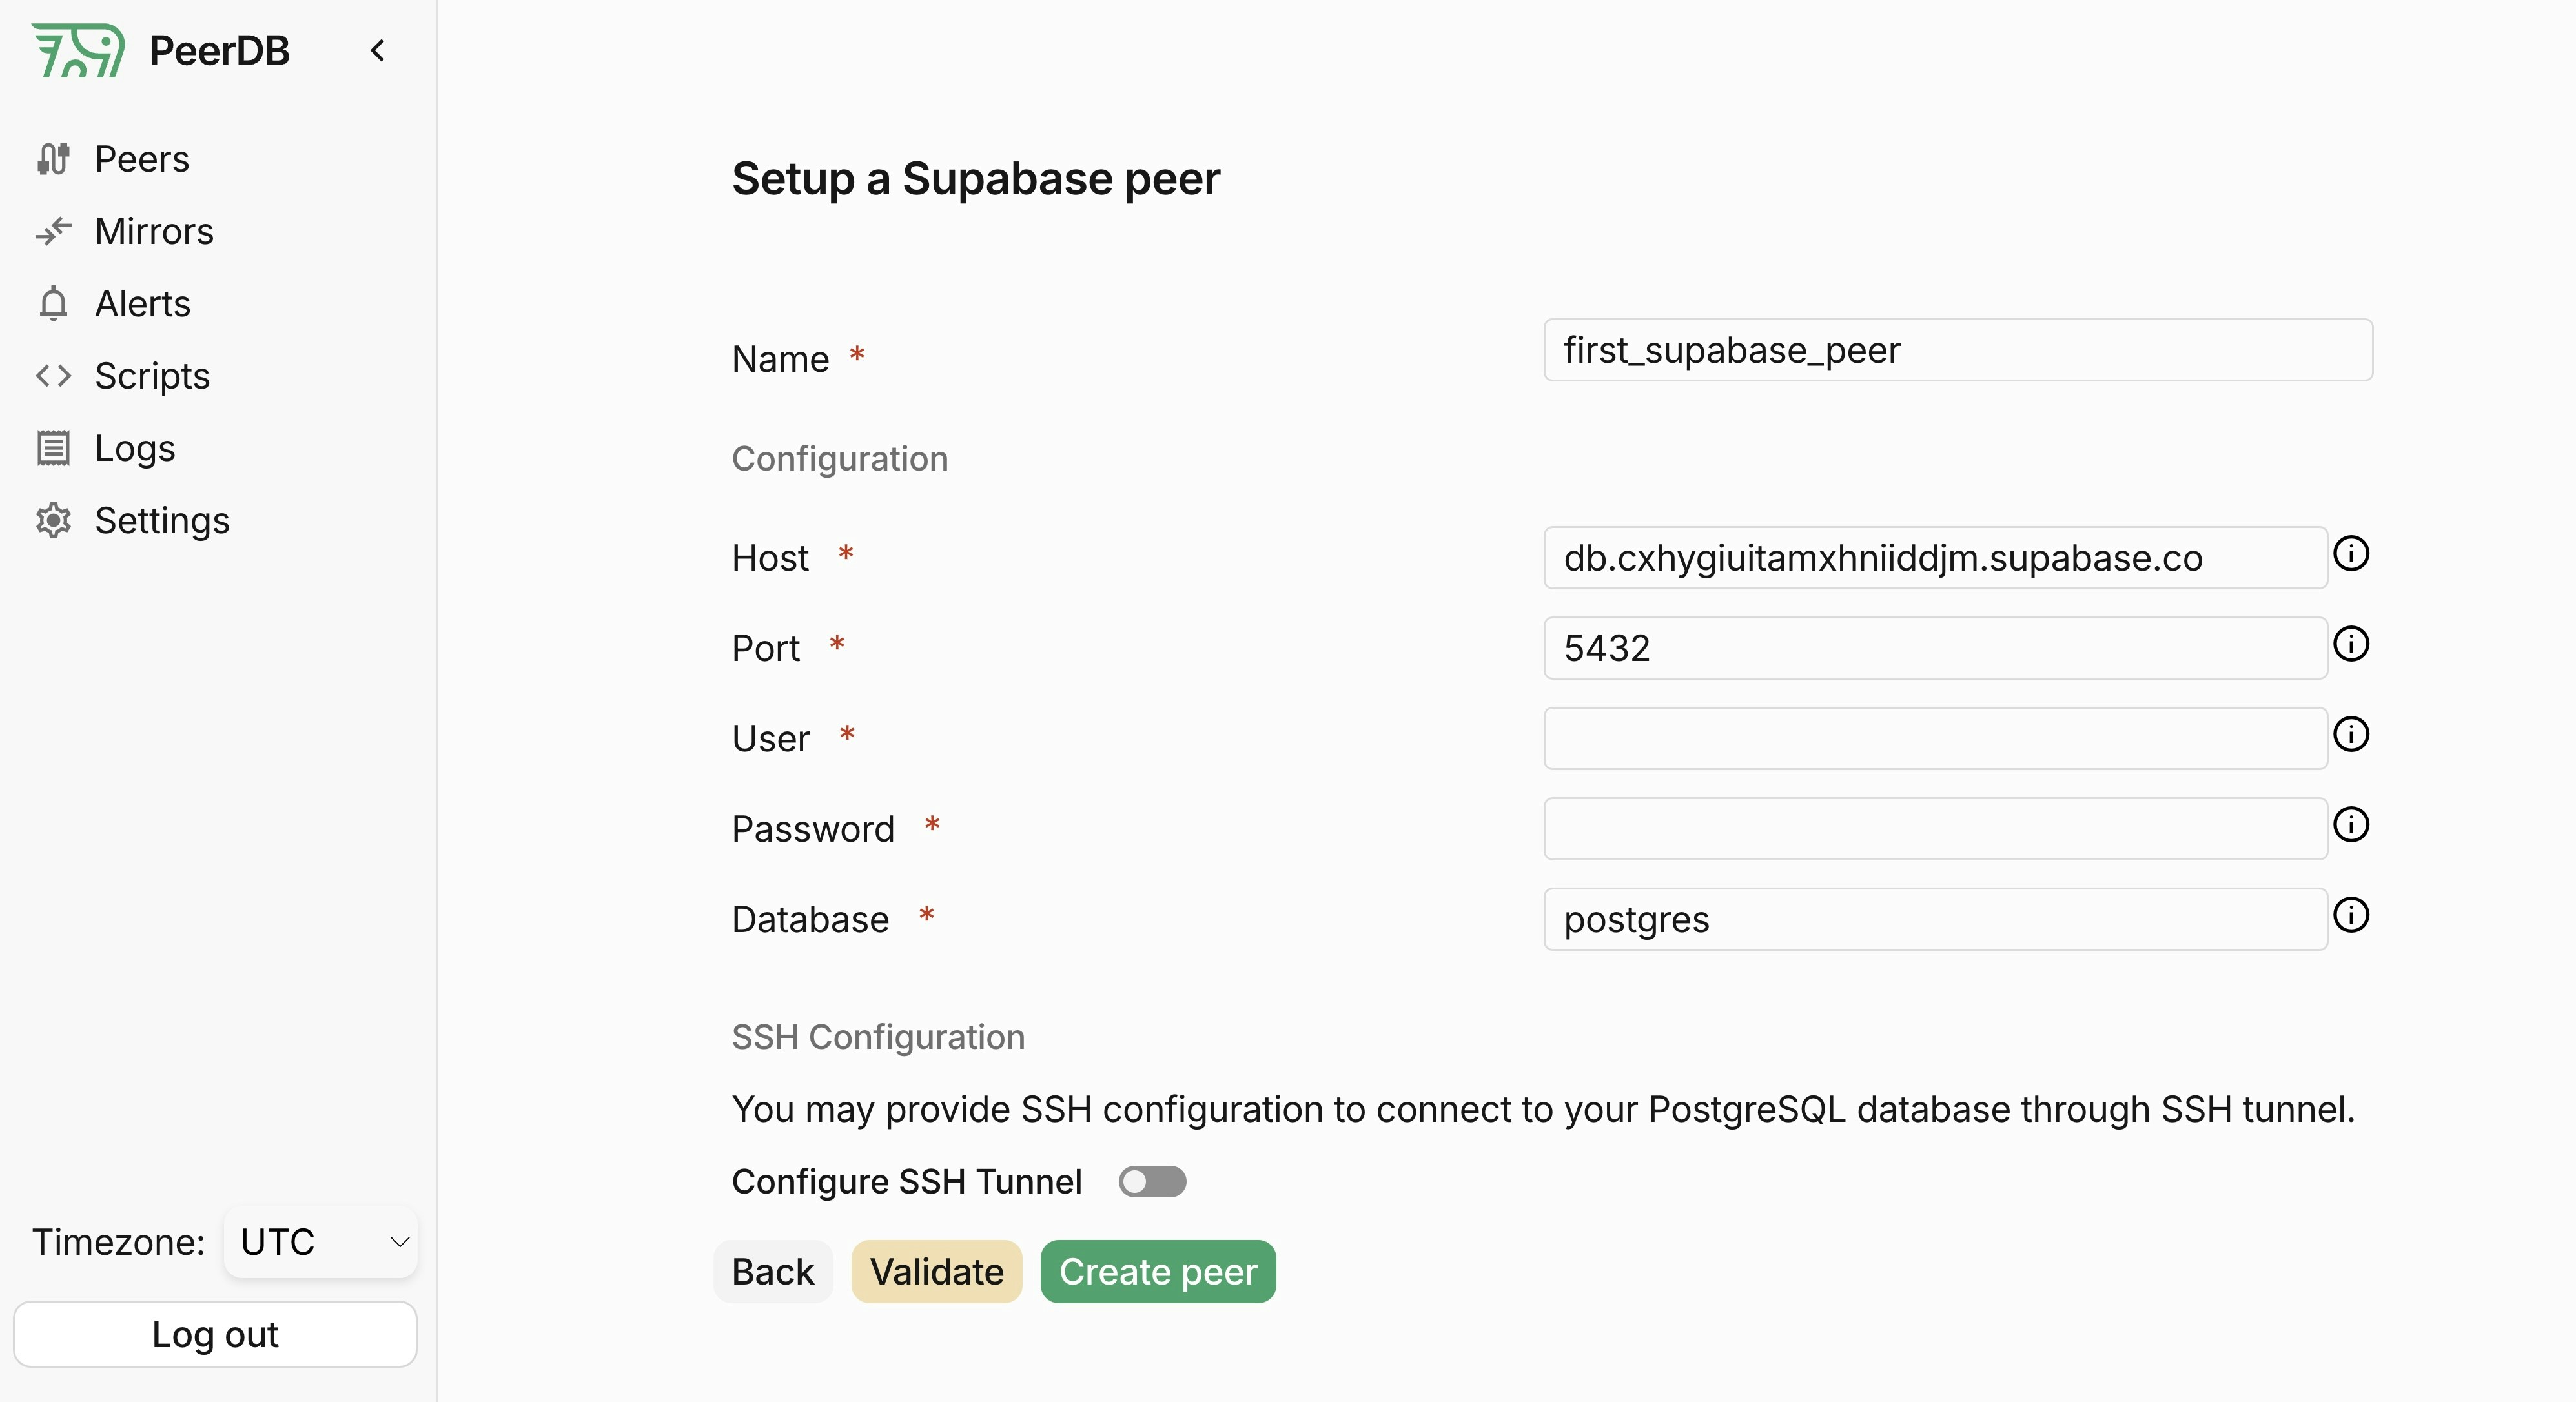 4. Click on **Validate** and once that's green, you can go ahead and click on **Create** to create the peer!
This is a recommended configuration change to ensure that large transactions/commits do not cause the replication slot to be dropped.
This step will restart your Supabase database and may cause a brief downtime.
You can increase the `max_slot_wal_keep_size` parameter for your Supabase database to a higher value (at least 100GB or `102400`) by following the [Supabase Docs](https://supabase.com/docs/guides/database/custom-postgres-config#cli-supported-parameters)
For better recommendation of this value you can contact the PeerDB team.
When creating the Mirror, make sure to reuse the same publication you created earlier in Step 1
4. Click on **Validate** and once that's green, you can go ahead and click on **Create** to create the peer!
This is a recommended configuration change to ensure that large transactions/commits do not cause the replication slot to be dropped.
This step will restart your Supabase database and may cause a brief downtime.
You can increase the `max_slot_wal_keep_size` parameter for your Supabase database to a higher value (at least 100GB or `102400`) by following the [Supabase Docs](https://supabase.com/docs/guides/database/custom-postgres-config#cli-supported-parameters)
For better recommendation of this value you can contact the PeerDB team.
When creating the Mirror, make sure to reuse the same publication you created earlier in Step 1