> ## Documentation Index
> Fetch the complete documentation index at: https://docs.peerdb.io/llms.txt
> Use this file to discover all available pages before exploring further.
# Neon Postgres Source Setup Guide
This is a guide on how to create a Neon PostgreSQL peer which you can use for replication in PeerDB.
Make sure you're signed in to your [Neon console](https://console.neon.tech/app/projects) for this setup.
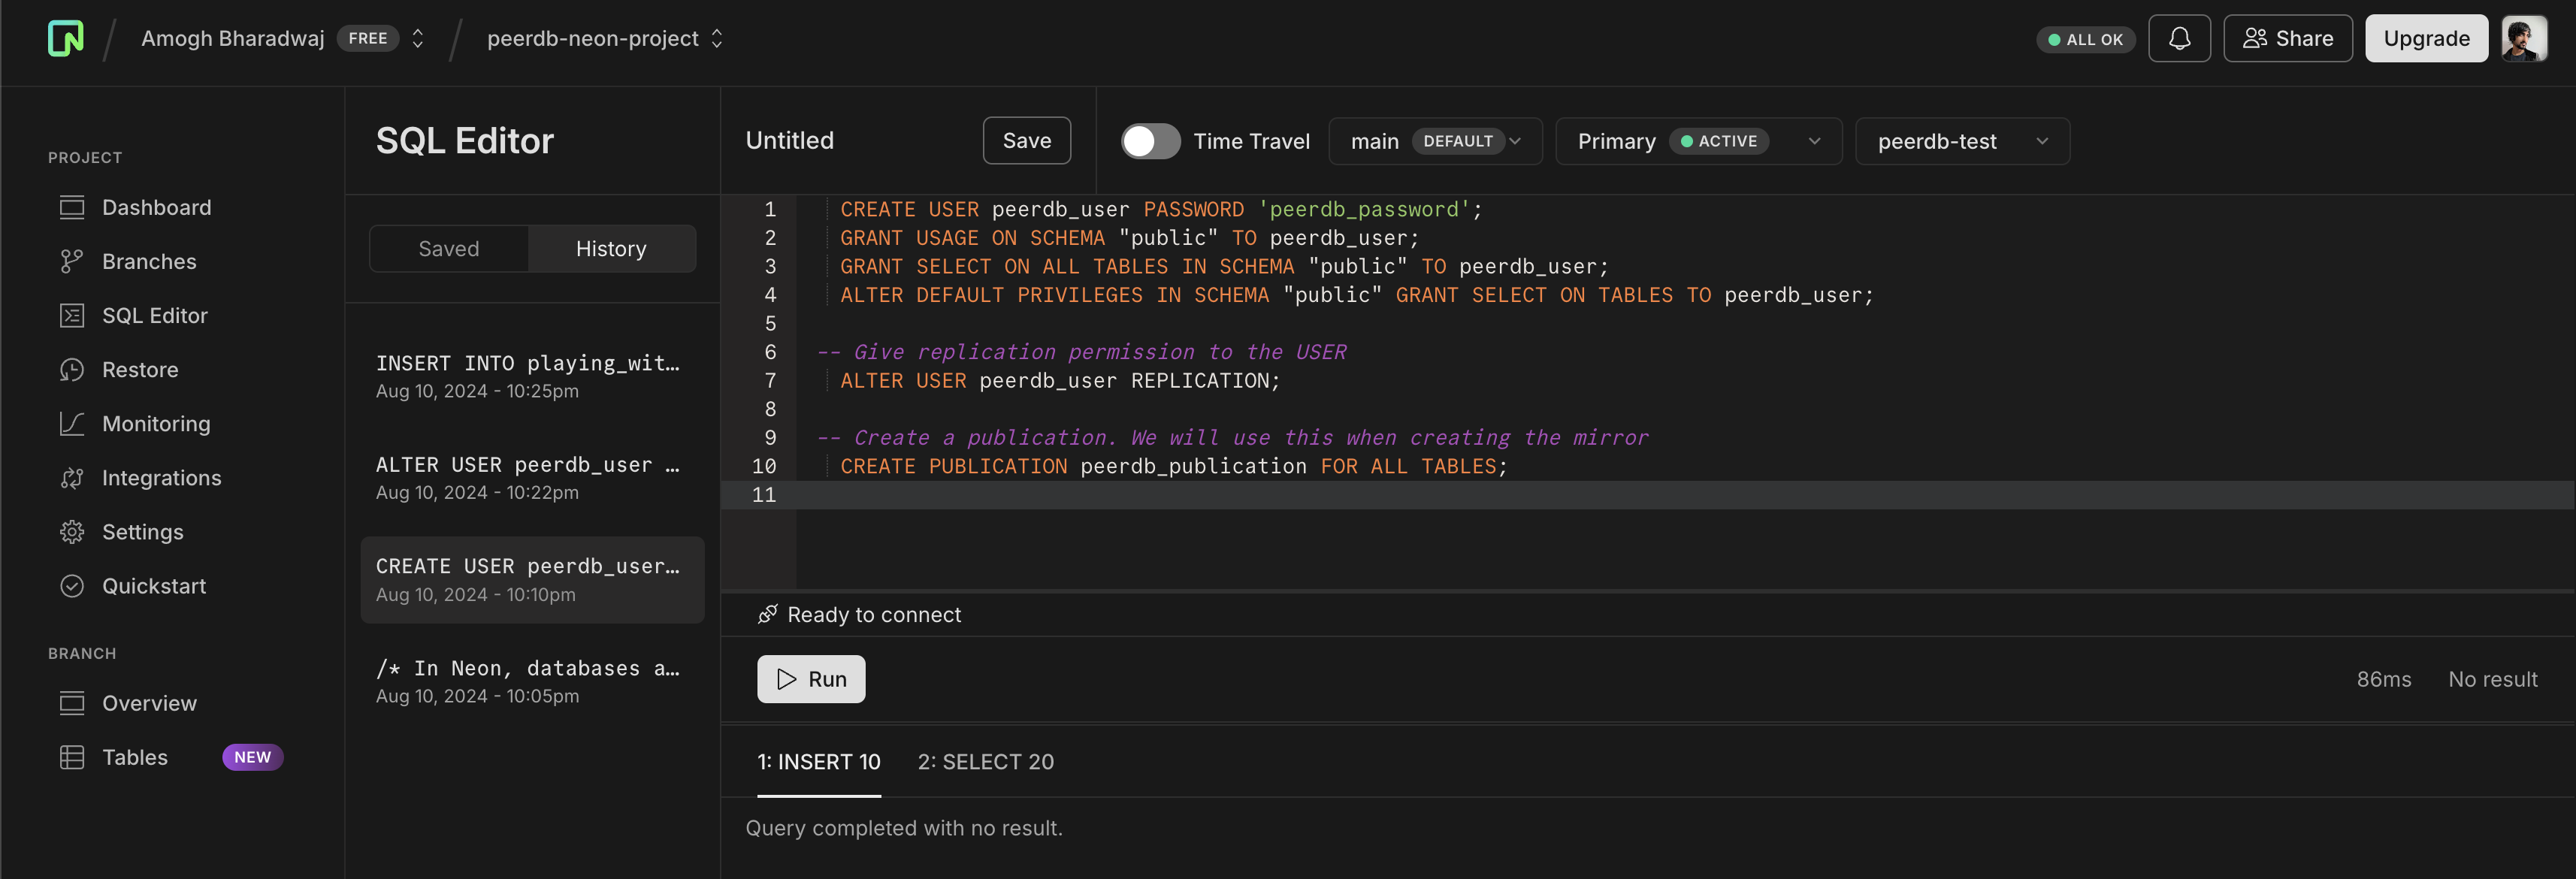
## Creating a user with permissions
Let's create a new user for PeerDB with the necessary permissions suitable for CDC,
and also create a publication that we'll use for replication. For this, you can head over to the **SQL Console** tab.
1. Create a dedicated user for PeerDB:
1. ```sql theme={null}
CREATE USER peerdb_user PASSWORD 'some-password';
```
2. Grant schema-level, read-only access to the user you created in the previous step. The following example shows permissions for the `public` schema. Repeat these commands for each schema containing tables you want to replicate:
1. ```sql theme={null}
GRANT USAGE ON SCHEMA "public" TO peerdb_user;
GRANT SELECT ON ALL TABLES IN SCHEMA "public" TO peerdb_user;
ALTER DEFAULT PRIVILEGES IN SCHEMA "public" GRANT SELECT ON TABLES TO peerdb_user;
```
3. Grant replication privileges to the user:
1. ```sql theme={null}
ALTER USER peerdb_user WITH REPLICATION;
```
4. Create a [publication](https://www.postgresql.org/docs/current/logical-replication-publication.html) with the tables you want to replicate. We strongly recommend only including the tables you need in the publication to avoid performance overhead.
Any table included in the publication must either have a **primary key** defined *or* have its **replica identity** configured to `FULL`.
1. To create a publication for specific tables:
```sql theme={null}
CREATE PUBLICATION peerdb_publication FOR TABLE table_to_replicate, table_to_replicate2;
```
2. To create a publication for all tables in a specific schema:
```sql theme={null}
CREATE PUBLICATION peerdb_publication FOR TABLES IN SCHEMA "public";
```
The `peerdb_publication` publication will contain the set of change events generated from the specified tables, and will later be used to create the MIRROR (replication).
 The PeerDB user must not be restricted by RLS policies, as it can lead to missing data. You can disable RLS policies for the user by running the below command:
```sql theme={null}
ALTER USER peerdb_user BYPASSRLS;
```
Click on **Run** to have a publication and a user ready.
## Enable Logical Replication
In Neon, you can enable logical replication through the UI. This is necessary for PeerDB's CDC to replicate data.
Head over to the **Settings** tab and then to the **Logical Replication** section.
The PeerDB user must not be restricted by RLS policies, as it can lead to missing data. You can disable RLS policies for the user by running the below command:
```sql theme={null}
ALTER USER peerdb_user BYPASSRLS;
```
Click on **Run** to have a publication and a user ready.
## Enable Logical Replication
In Neon, you can enable logical replication through the UI. This is necessary for PeerDB's CDC to replicate data.
Head over to the **Settings** tab and then to the **Logical Replication** section.
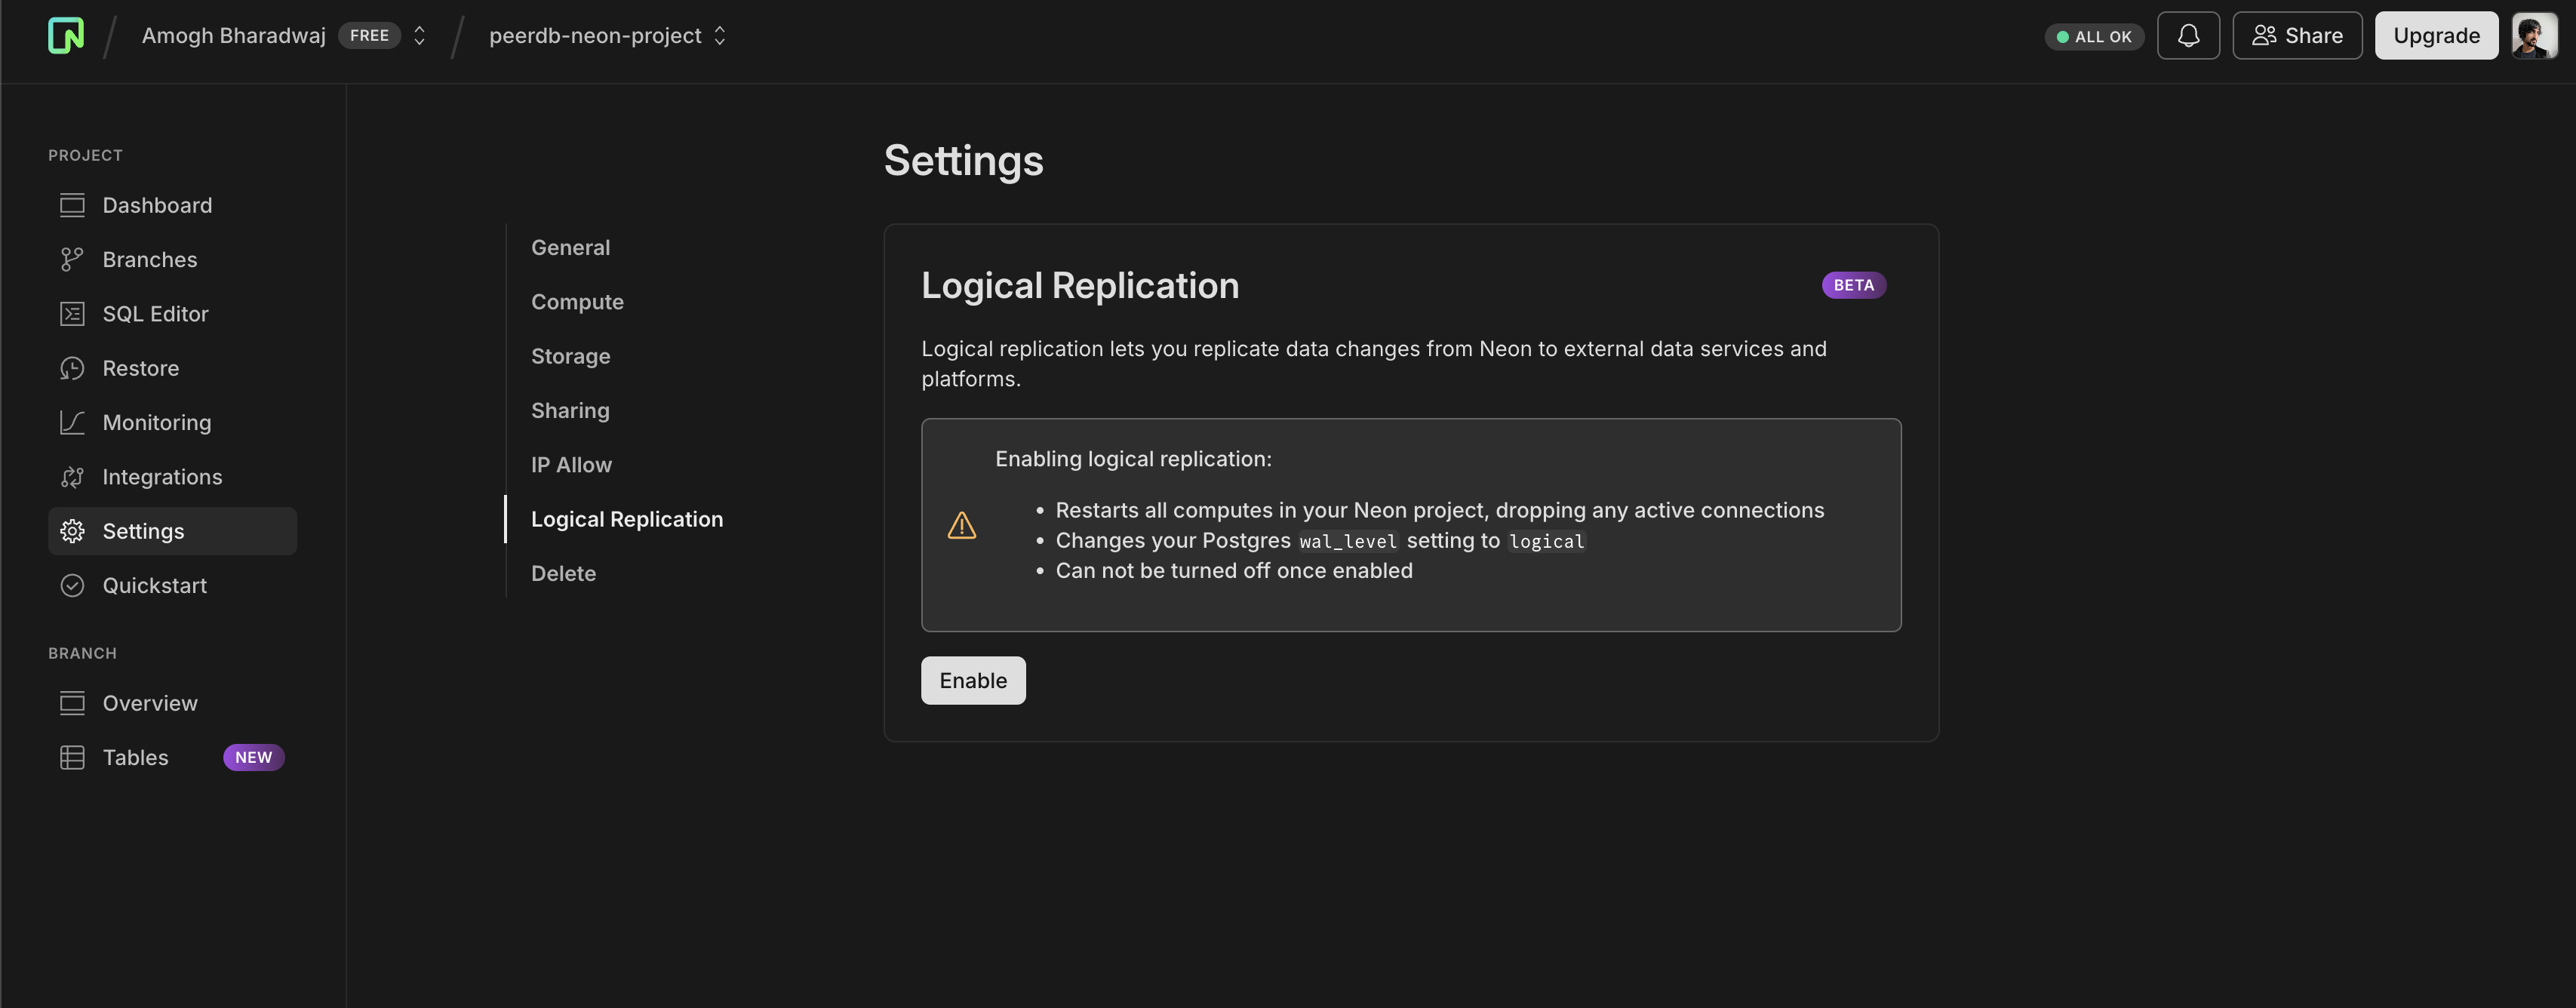 Click on **Enable** to be all set here. You should see the below success message once you enable it.
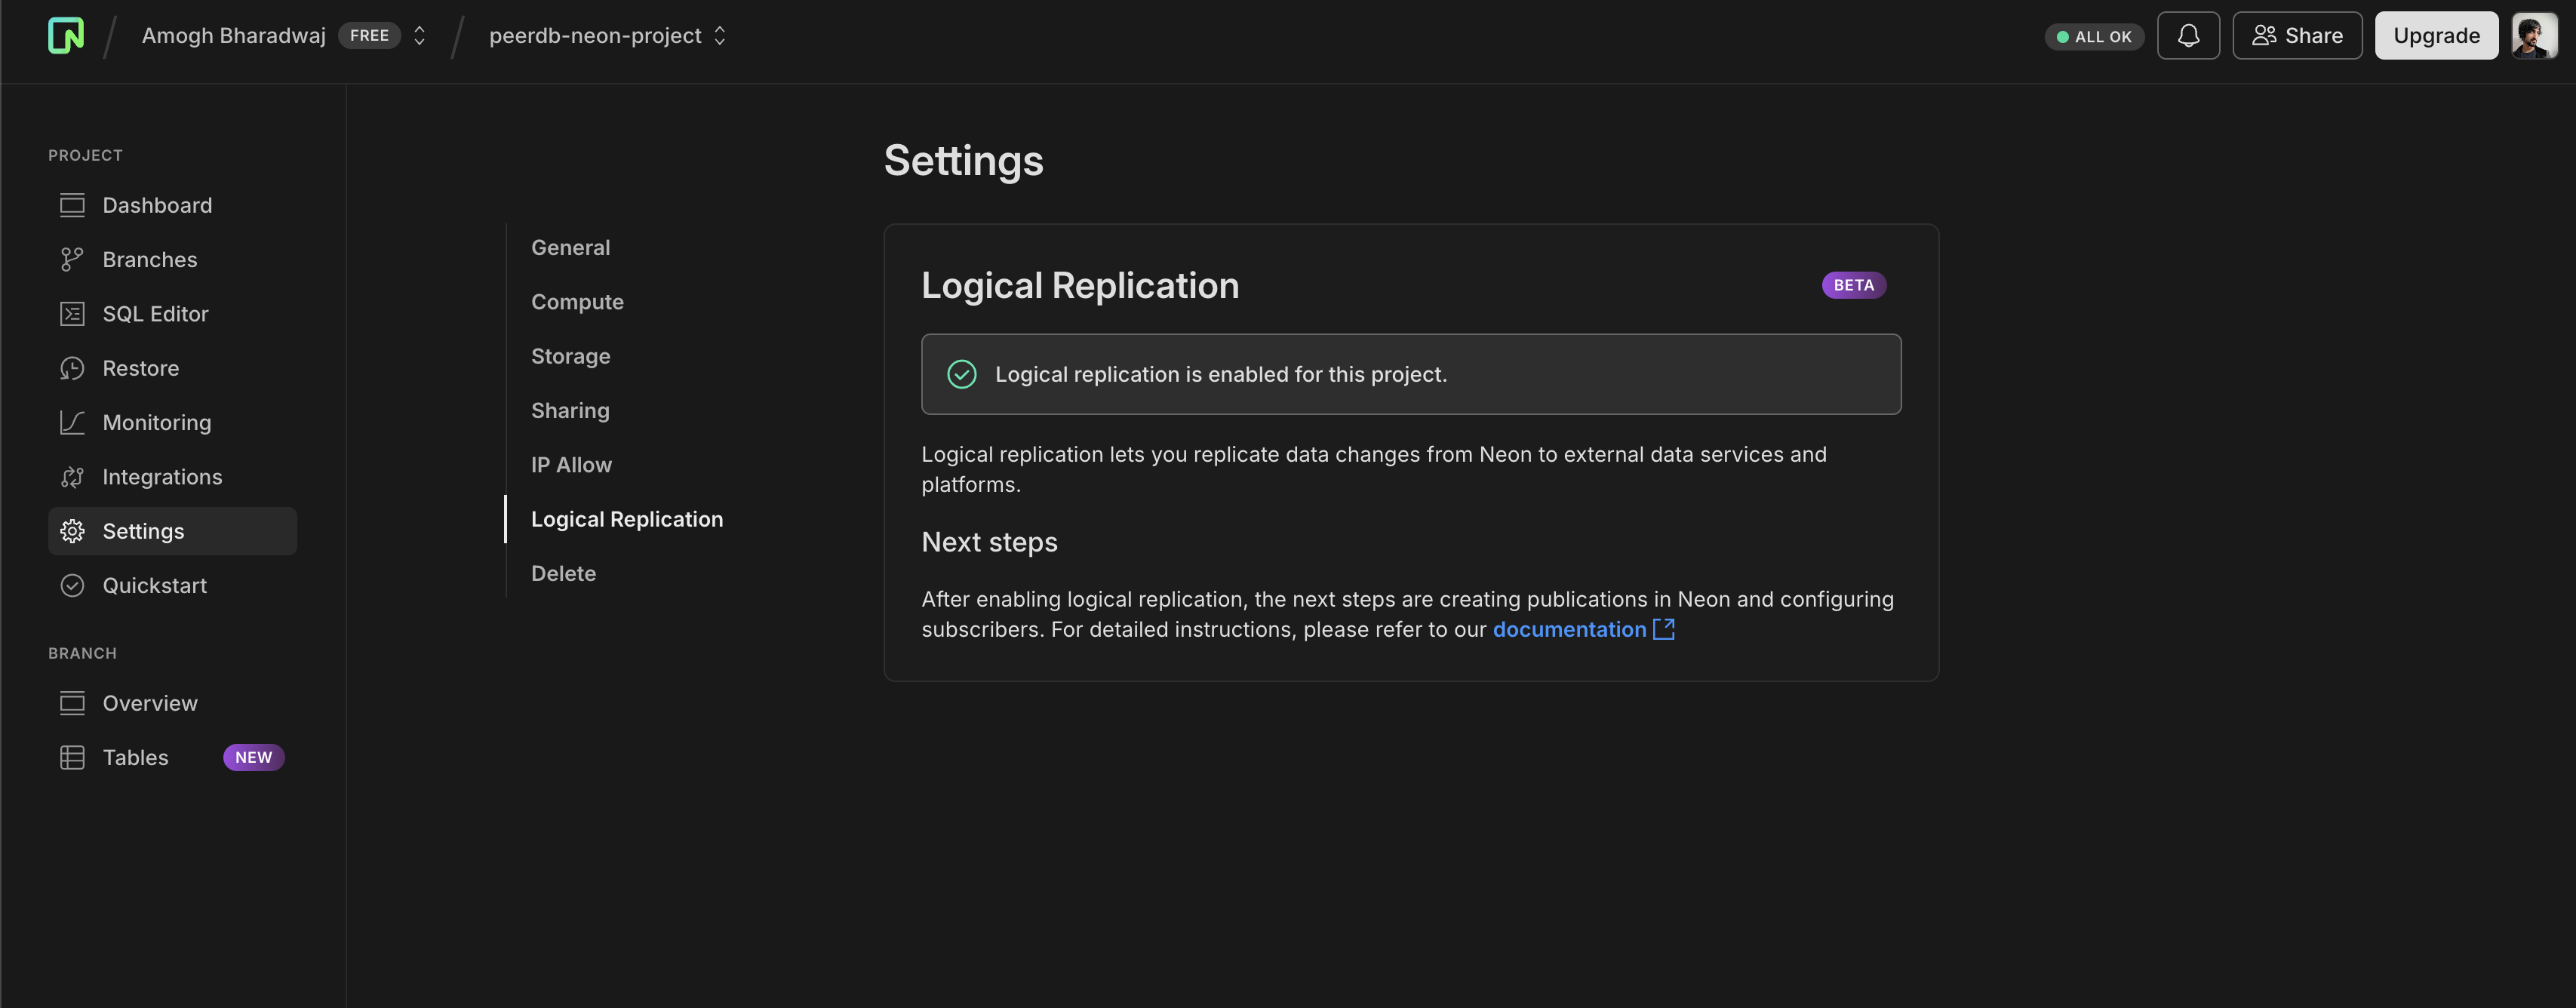 Let's verify the below settings in your Neon Postgres instance:
```sql theme={null}
SHOW wal_level; -- should be logical
SHOW max_wal_senders; -- should be 10
SHOW max_replication_slots; -- should be 10
```
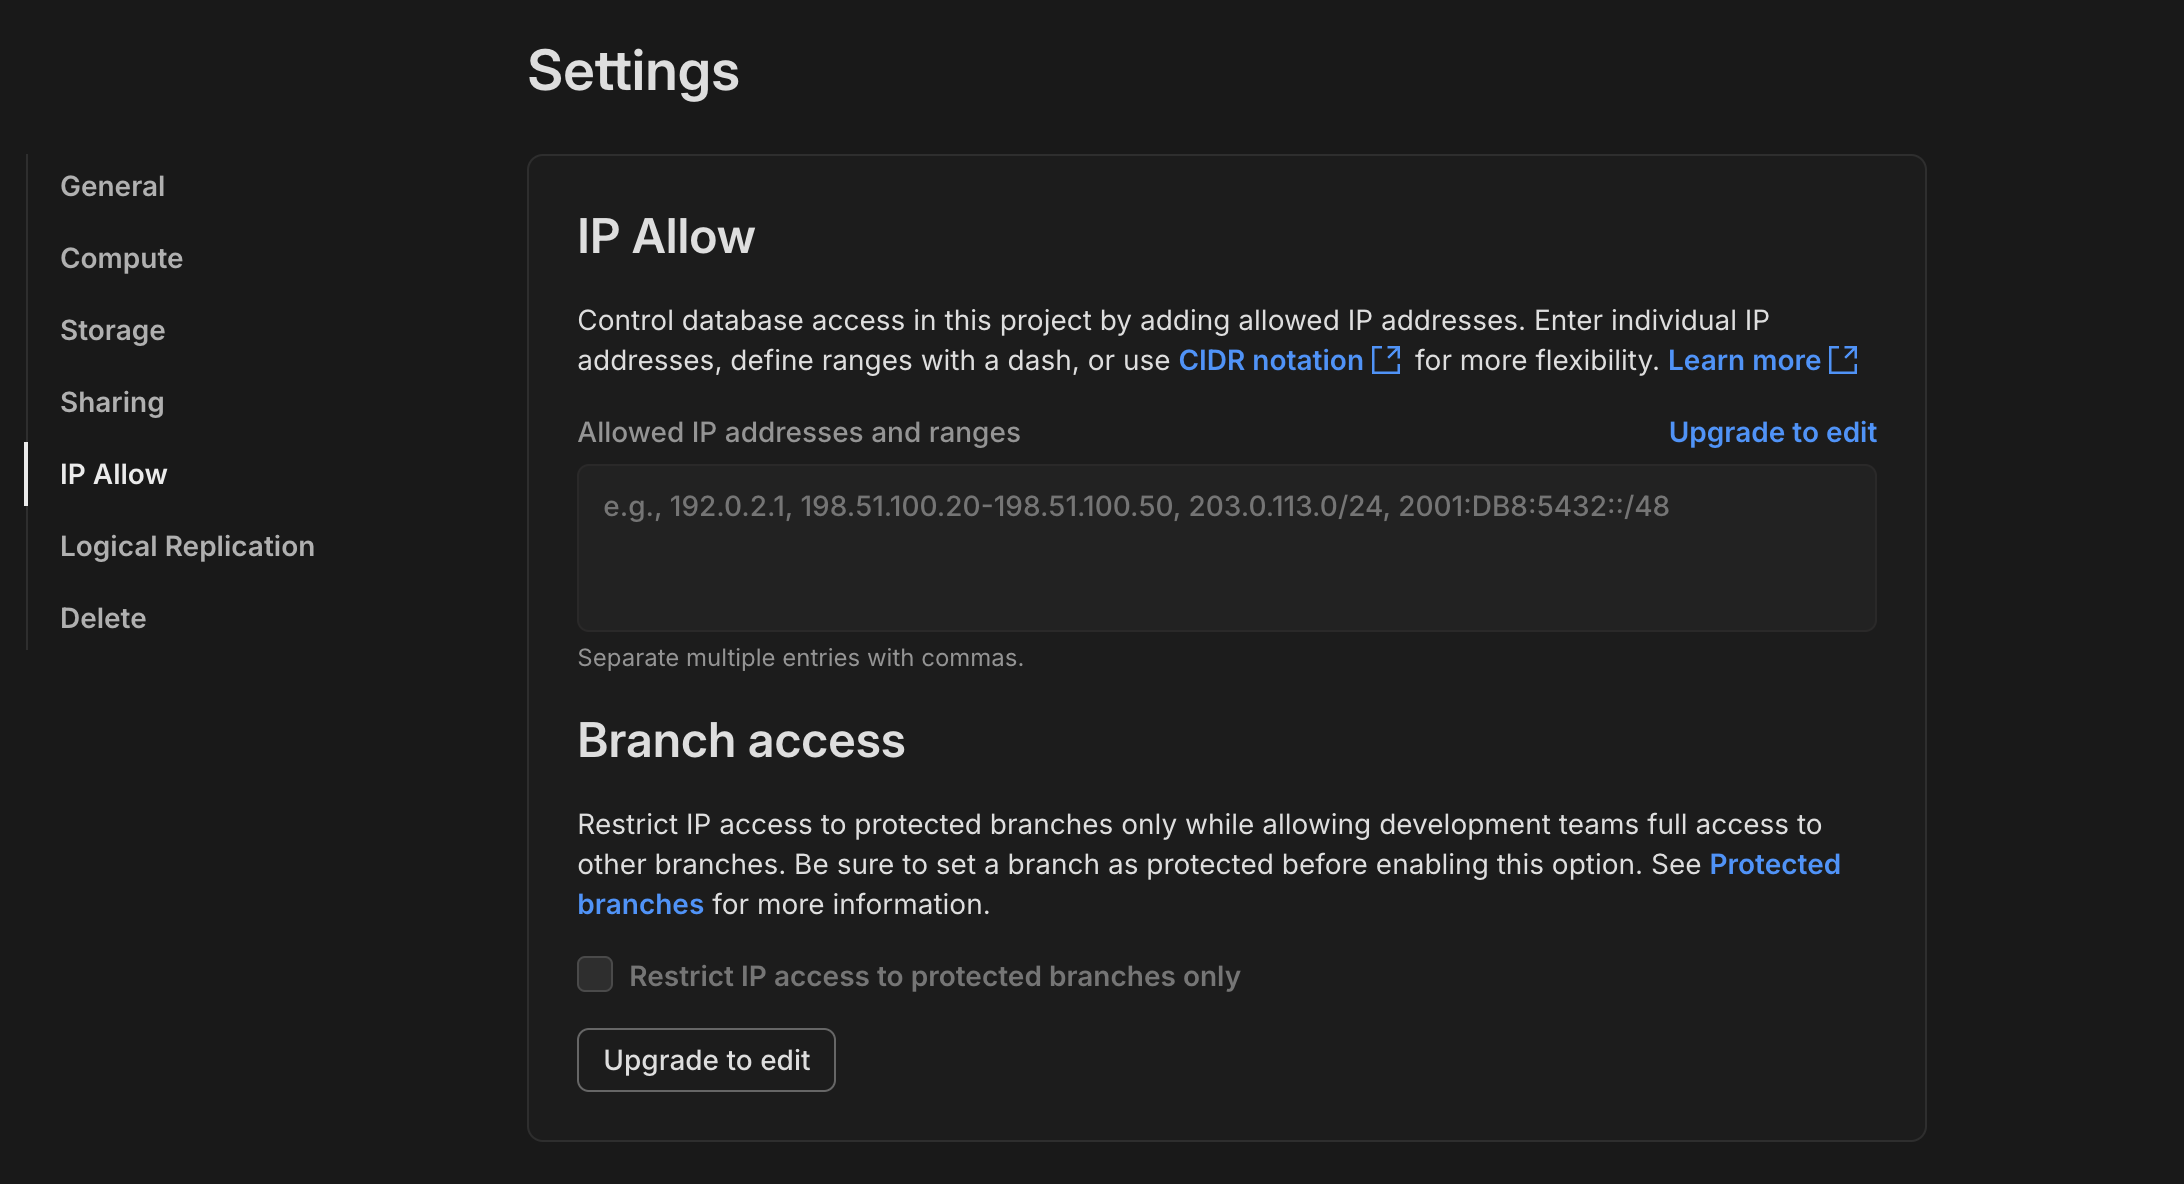
## IP Whitelisting (For Neon Enterprise plan)
If you have Neon Enterprise plan, you can whitelist the [PeerDB Cloud IP addresses](/peerdb-cloud/ip-table) (or the equivalent for PeerDB OSS/Enterprise) to allow replication from PeerDB Cloud to your Neon Postgres instance.
To do this you can click on the **Settings** tab and go to the **IP Allow** section.
Let's verify the below settings in your Neon Postgres instance:
```sql theme={null}
SHOW wal_level; -- should be logical
SHOW max_wal_senders; -- should be 10
SHOW max_replication_slots; -- should be 10
```
## IP Whitelisting (For Neon Enterprise plan)
If you have Neon Enterprise plan, you can whitelist the [PeerDB Cloud IP addresses](/peerdb-cloud/ip-table) (or the equivalent for PeerDB OSS/Enterprise) to allow replication from PeerDB Cloud to your Neon Postgres instance.
To do this you can click on the **Settings** tab and go to the **IP Allow** section.
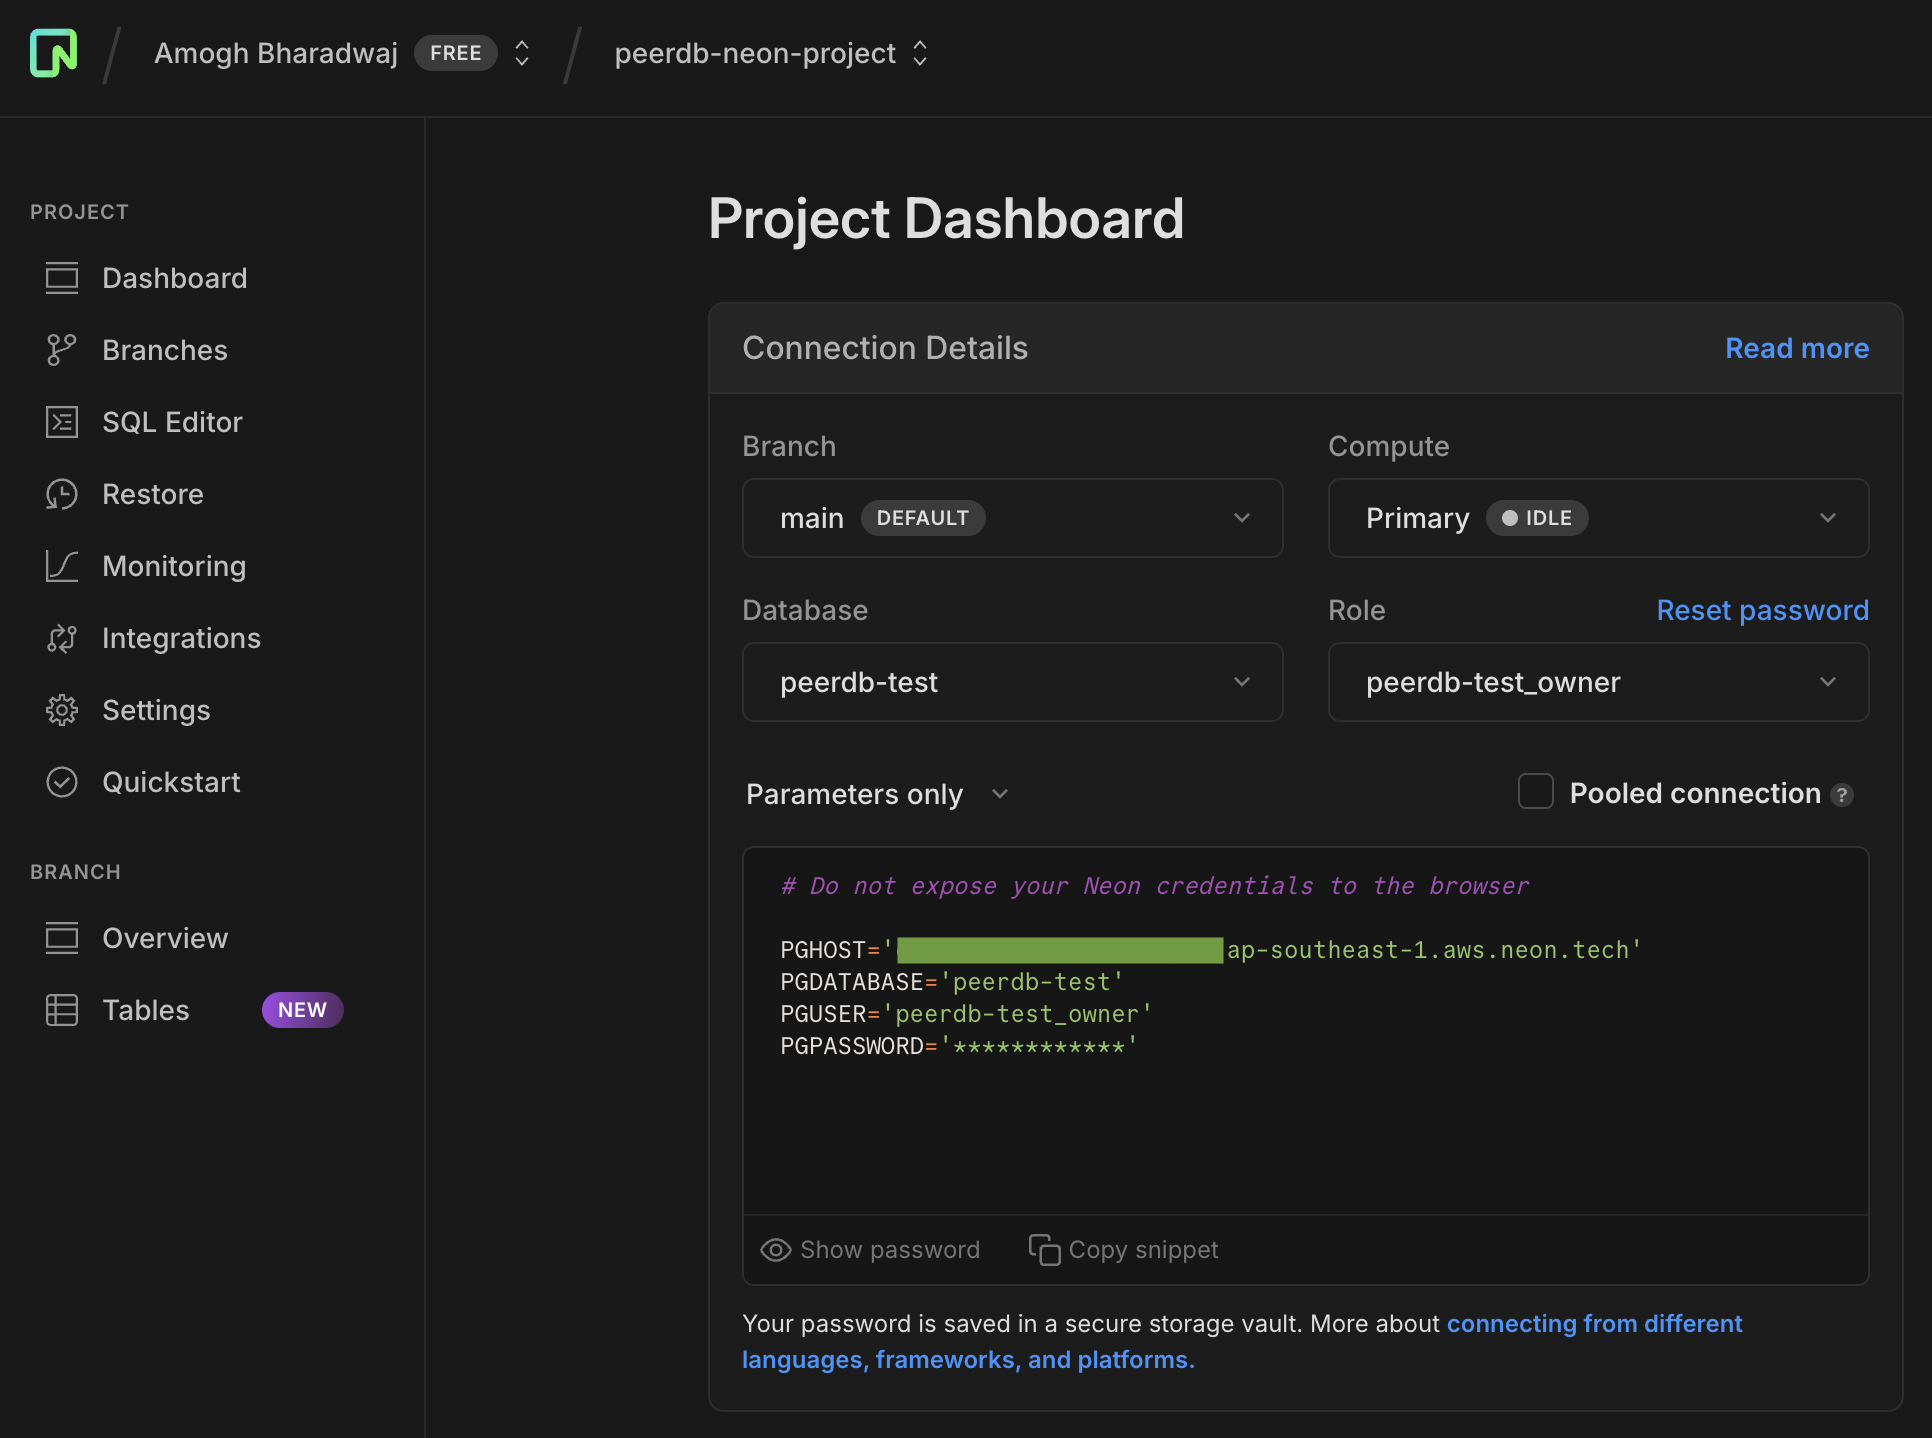
 ## Copy Connection Details
Now that we have the user, publication ready and replication enabled, we can copy the connection details to create a Neon Postgres peer in PeerDB.
Head over to the **Dashboard** and at the text box where it shows the connection string,
change the view to **Parameters Only**. We will need these parameters for our next step.
## Copy Connection Details
Now that we have the user, publication ready and replication enabled, we can copy the connection details to create a Neon Postgres peer in PeerDB.
Head over to the **Dashboard** and at the text box where it shows the connection string,
change the view to **Parameters Only**. We will need these parameters for our next step.
 ## Create Neon Postgres Peer in PeerDB UI
Now that we have the connection details, we can create a Neon Postgres peer in PeerDB.
Head over to the PeerDB UI and click on **Create Peer**. Select **Neon** as the source.
## Create Neon Postgres Peer in PeerDB UI
Now that we have the connection details, we can create a Neon Postgres peer in PeerDB.
Head over to the PeerDB UI and click on **Create Peer**. Select **Neon** as the source.
 Fill in the Neon connection details that we copied earlier in the following form.
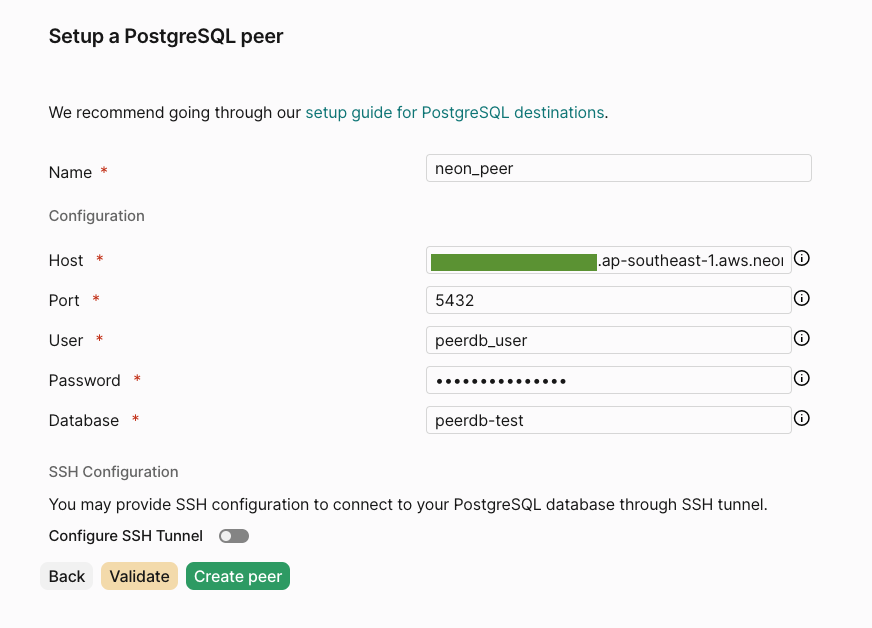 Click on **Validate** and once that's green, you can go ahead and click on **Create** to create the peer!
## Important Gotchas
In Neon databases that are idle (no activity), slots can be dropped. To prevent this, you need to ensure that the replication slot actively receives database changes. You can use pg\_logical\_emit\_message()—a system function for emitting a logical decoding message into the WAL. PeerDB picks up the message as part of its WAL processing and flushes the slot at the frequency of the CDC sync interval.
You'd need to grant EXECUTE permissions for the peerdb replication user on this function:
```SQL theme={null}
GRANT EXECUTE ON FUNCTION pg_logical_emit_message( transactional boolean, prefix text, content text )
TO ;
```
Edit the current value fields of the following settings in the **Settings** tab in UI:
* `PEERDB_ENABLE_WAL_HEARTBEAT`: Set this to `true` (no quotes or anything)
* `PEERDB_WAL_HEARTBEAT_QUERY`: Set this to the emit\_message function call command to be run periodically:
```sql theme={null}
SELECT pg_logical_emit_message(false,'heartbeat','')
```
Currently, PeerDB emits a message every 12 minutes. This will soon be configurable.
Click on **Validate** and once that's green, you can go ahead and click on **Create** to create the peer!
## Important Gotchas
In Neon databases that are idle (no activity), slots can be dropped. To prevent this, you need to ensure that the replication slot actively receives database changes. You can use pg\_logical\_emit\_message()—a system function for emitting a logical decoding message into the WAL. PeerDB picks up the message as part of its WAL processing and flushes the slot at the frequency of the CDC sync interval.
You'd need to grant EXECUTE permissions for the peerdb replication user on this function:
```SQL theme={null}
GRANT EXECUTE ON FUNCTION pg_logical_emit_message( transactional boolean, prefix text, content text )
TO ;
```
Edit the current value fields of the following settings in the **Settings** tab in UI:
* `PEERDB_ENABLE_WAL_HEARTBEAT`: Set this to `true` (no quotes or anything)
* `PEERDB_WAL_HEARTBEAT_QUERY`: Set this to the emit\_message function call command to be run periodically:
```sql theme={null}
SELECT pg_logical_emit_message(false,'heartbeat','')
```
Currently, PeerDB emits a message every 12 minutes. This will soon be configurable.